How to Turn a Mirror into a Chalkboard
*As an Amazon Associate and member of other affiliate programs, I earn from qualifying purchases.
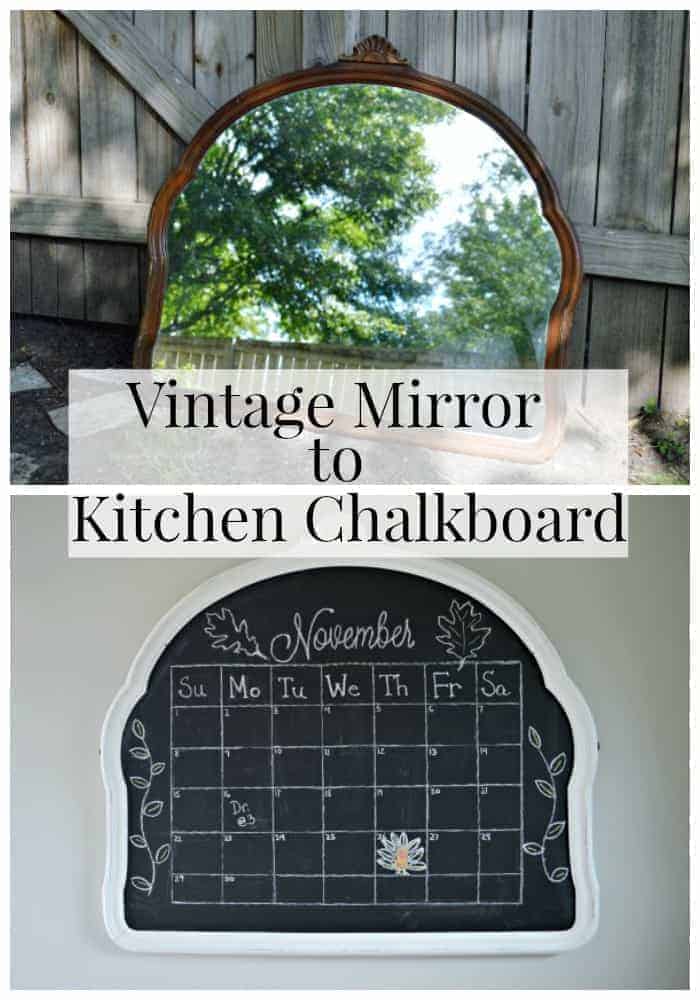
How to turn a mirror into a chalkboard using chalkboard paint. A quick and easy DIY project that transforms an old dresser mirror.
If you’ve been following our kitchen remodel, then you know that we have a very small, galley style kitchen. What you may not know is that there’s only one wall that we can hang any kind of decor on. Eek!

My original idea was to turn an old, chippy window into a chalkboard, but when I saw this vintage mirror at a local ReStore for $10, I knew that the window idea was, well…out the window.
I was looking for something with some curves in it to balance out all the straight lines in the kitchen and this was it!
Supplies to turn a mirror into a chalkboard
As an Amazon Associate and member of other affiliate programs, I earn from qualifying purchases.
I wanted this to be a quick and easy project so I decided to use spray paint on the frame and chalkboard paint on the mirror.
The first thing I did was to remove the back so I could get the mirror out. Then I cleaned the dust and dirt off the mirror and the frame.
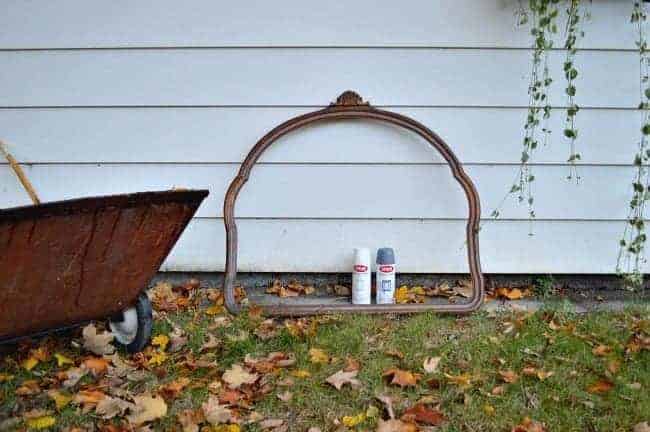
I’ve been wanting to try spray chalk paint for a while and this was the perfect project for it, so I picked up some chalky finish spray paint in gray and white. I used the gray as a base coat and then I used the classic white over that.
Both were super easy to use and dried quickly. I will say that the slate covered much better than the white but the finish was smooth and chalky.
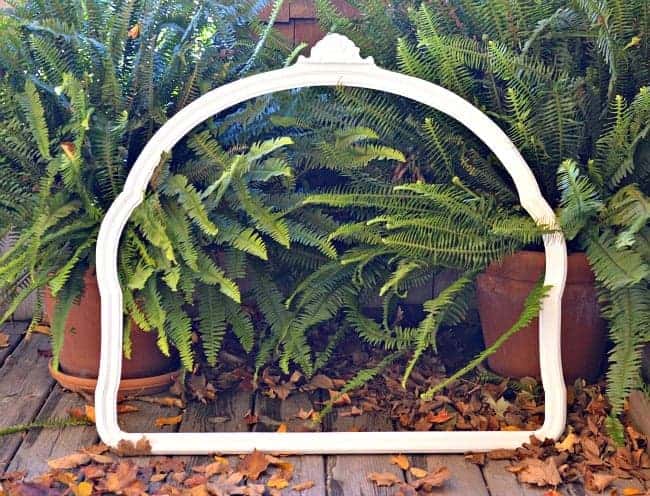
Once the frame was completely dry, I did a light sanding to expose some of the gray color and my frame was done. I was looking for a chalky, flat finish so I didn’t bother with waxing the frame.
The next victim was the mirror.
Can you paint over a mirror with chalkboard paint?
For those that ask “can you paint over a mirror with chalkboard paint?” I simply say, “why not?”
It actually turned out to be a super simple process.
To do this I used chalkboard paint in a black finish. I painted a quick coat, right on the mirror, with a foam brush and let it dry for 4 hours.
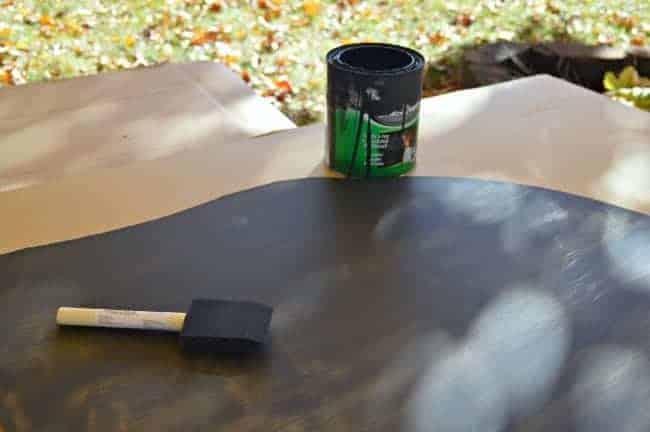
I let it dry the recommended time between coats and used opposite strokes for each coat (the first coat was from top to bottom, the second coat was from side to side, and so on). It took 4 coats to to get it looking the way I wanted.
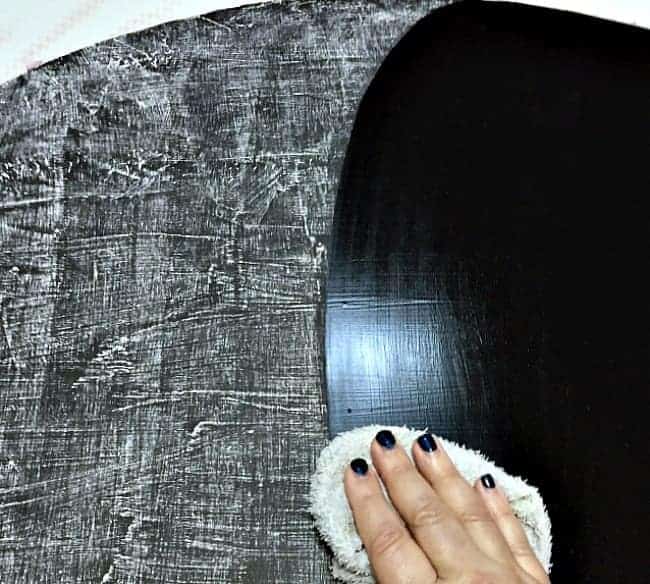
After letting the chalkboard dry for 4 days, as per the directions, I seasoned it with chalk.
It’s essential that you season a freshly painted chalkboard, otherwise you will always see what was written on the board. Chalkboard paint is very porous and using chalk to season it fills the little pores in the surface.
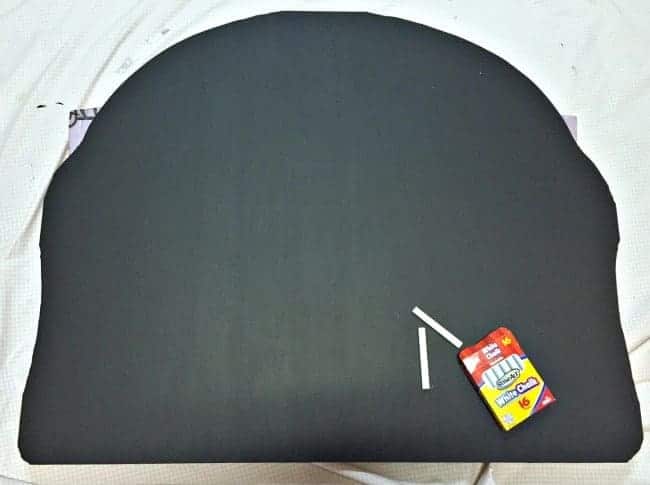
Simply take your chalk and use the side, rather than the tip, to rub the entire surface. Make sure you rub the chalk vertically and horizontally. After you’ve completely covered your board with chalk, take a soft, damp cloth and clean the surface. Now your chalkboard is ready for fun!
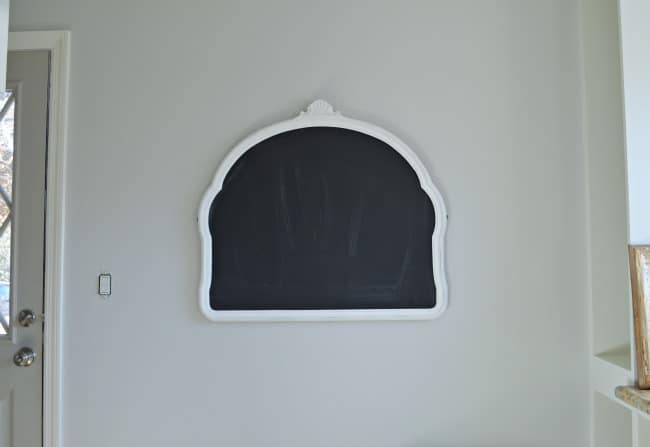
After I finished seasoning the chalkboard, I put it back in the frame and reattached the backing. I added hooks and wire and hung it on the wall in the kitchen.
I’m showing you the chalkboard and the whole wall to give you some perspective of the only space that I can hang decor. The kitchen is a work in progress so light switches and cabinet doors are still missing.
I’ve wanted a chalkboard calendar for as long as I can remember, which is why I originally got the old window, so that’s what I made. This actually worked out better because I can see the whole month’s list of activities.
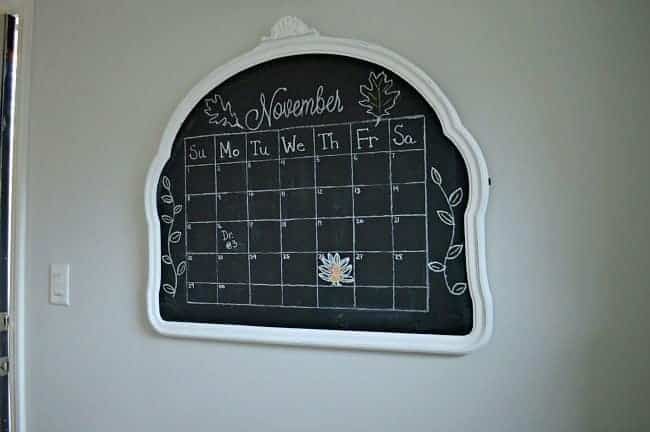
I love how it turned out and it’ll be fun to do different themes every month.
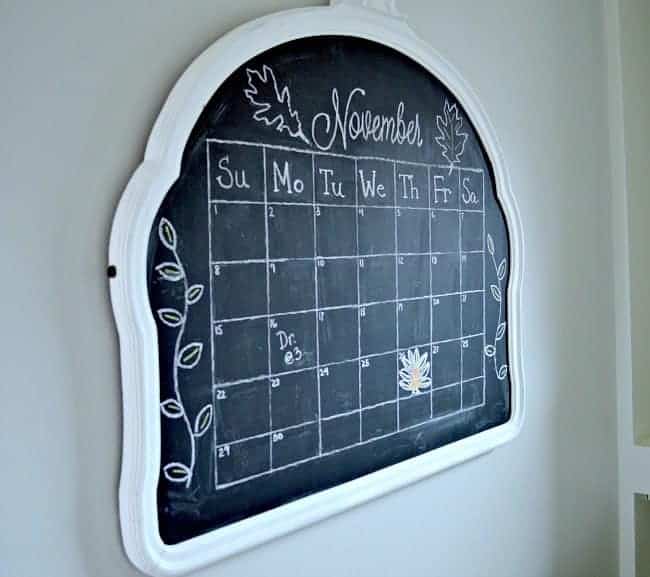
I know chalkboards have been around a while, but have you ever turned a mirror into one?
As always, thanks for stopping in!
Want to know how I created the chalkboard calendar? Check out my easy tutorial.
Also, make sure you check out our kitchen remodel, that we completed for under $3000.
I Love the chalkboard mirror! I was wondering if I could chalkboard paint the back of the mirror instead of the front. I was wanting to take mirror out of frame and flip it over. I might change my mind later and want the mirror side exposed.
Thanks Mary! I don’t see why you couldn’t paint the back of the mirror. Worst case scenario is that it doesn’t work and you have to paint the mirror.
I have a window with it’s frame I’d like to turn into a chalkboard calendar very similar to this. Do you think the chalkboard paint would work as well on glass as it did on the mirror?
Hi Lynette. I think that the chalkboard paint would work on the glass. I would just make sure that you follow the directions on the label and make sure you let the paint dry between coats. Good luck with your project and let me know if you have any questions.
Love this! its amazing how what chalk board can do!
Thanks so much Maria! You’re right. I just love chalk board projects. 🙂
Love the way this came out!
Thanks so much Jennifer. I really love how it turned out, too. 😉
What a great job! It turned out beautiful! I would of grabbed that curvy beauty up too!
Thanks so much Linda, I appreciate it. It makes thrifting so much more fun when you find that perfect piece. 🙂
So cute and a wonderful way to repurpose the old into the new. I love it when I can take an existing item to use for projects. Great for the environment.
Thanks Celeste! I love when I can repurpose something old. 🙂
This is a great idea – I’m on a quest now to find a cool mirror! Would love to have you share at the Pleasures of the NW’s DIY party!
Thanks Helen, I appreciate it! 🙂
Loving this. It turned out great!
Thanks so much, Charlene! It’s one of my favorite finds.
Kristi this turned out really super. And you were lucky to find such a large mirror to make it on. Perfect for a calender.
Thanks Mary. It was a really lucky find. As soon as I saw it I grabbed it and wouldn’t let go. 🙂
Love this! Such a difference and very functional now!
Thanks for linking up with Welcome Home Wednesdays! Live every Wednesday at 7AM CT.
liz
Thanks, Liz!
So you literally just painted the mirror with the chalkboard paint – no fiddly cutting out ply to fit or anything like that?
That is brilliant and it works so well, pretty and practical!
Yes, Julie, I just painted on top of the mirror. It actually worked quite well because the mirror was so smooth. Really, it’s such an easy project to do. Thanks for stopping in. 🙂
That turned out so well! Love the idea.
Thanks so much, Catherine! I love that it’s practical (with the calendar) and pretty. 🙂
What a clever project! I love how it has this more interesting shape as a chalkboard, instead of the usual rectangular boards, because of the mirror’s frame. Well done!
Thanks so much! The shape of the mirror is what drew me to it.
I love this idea. It is not every day you find an elegant chalk board.
Thanks! I’m thrilled with the way it turned out.
Cute, I love how you repurposed the mirror.
Thanks so much, I appreciate it!
Outstanding project. It really turned out wonderful. Thanks for sharing!
Thanks so much Pamela. I’m really pleased with the way it turned out.
Beautiful transformation! I love the unique shape of the mirror frame! Thanks for linking up with Merry Monday 🙂
Thanks Emily. It was a fun project to do. 🙂
This looks so lovely. I am insired to try it myself. Never thought of using a mirror! Thanks for this post.
This turned out perfect! I love it! I hear you about the kitchen reno taking forever. We are in the middle of ours right now and at times I wonder if we will ever finish it, lol.
I know, right? We are in over a year right now and I’m just ready to be done. Thanks for stopping in Sarah, I appreciate it.
I simply couldn’t love this any more!!!!!!!!!!!!!!!!!!!!!!!!!!!!!!!!!!!!!
Thanks so much Deborah, I love how it turned out.
I love this! We will be featuring at tonight’s Share Your Style party!!
Awesome! Thanks Amanda!
Oh my gosh, that’s awesome! You were lucky to find such a pretty shape to work with.
Thanks Stacy! I looked for a long time for the right shape and size and was so happy when I found it in our local ReStore.
I have an antique mirror that looks horrible. The frame is great but the mirror itself is very distorted and I had the idea to change it into a chalkboard, but didn’t know how to go about it. You have given me the courage to make it happen. Thank you SO much!
Yay! I’m so happy that I was able to give you the courage to redo your mirror Vickie! It really was an easy project and the finished surface is so smooth, better than putting it on a wall or piece of wood. Good luck with your project and I would love to see it when it’s done. 🙂
LOVE IT!!!
Thanks so much Martina!
Love this project! It turned out perfect.
Thanks so much Pamela! I’m really happy with the results. 🙂
I LOVE this, Kristi! Wonderful frame. I like the fact that you made the chalk board a calendar I didn’t know abou.t the spray chalky finish paint. So thanks for sharing that, and for the chalk board seasoning advice. Great post! xo ~ Nancy
Awww, thanks so much for the sweet comment Nancy! It was a fun and easy project to do and I love how it turned out. 🙂
I appreciate you stopping by and hope that you have a great week!
That came out great. You are lucky you can draw and print nice. That is the reason I do not have A chalk board, my writing and printing a not pretty. Great idea with the mirror.
Enjoy the weekend, Debbie
Thanks so much Debbie! I can’t draw to save my life but I did come up with a few tricks to make it look good, that I’ll be sharing on Monday.
Hope you are having a great weekend my friend! 🙂
Really turned out nice! I wish I had a spot for a large chalkboard, I would love something like that. Nice job!
Thanks MJ! I was a little afraid that it was too big but I like that I can see the calendar and not have to squint. 😉 How’s your project coming along?
Hope your weekend is great my friend!
love this i have a picture in a large frame and i want to try to do this with it xx
That’s awesome! I’d love to hear how it turns out. 🙂
I love it and what a pretty calendar!
Thanks so much Kim! The calendar took me longer to do than the chalkboard itself. 😉 Happy weekend!
What a great idea! It looks wonderful!
Thanks Brenda, I appreciate it. Hope you have a great weekend!
Great job! I see a Hometalk feature in your future!
Awww, thanks so much Kim! 🙂