
DIY Floating Mantel Shelf
This post may contain affiliate links, please see our policy for details.
Transforming a living space into a warm and inviting haven often involves personal touches that reflect your own style.
A floating mantel shelf not only adds a touch of sophistication but also provides the perfect spot to showcase a few cherished mementos, art pieces, a mirror or a bit of greenery.
In this post, we’ll roll up our sleeves to do a bit of DIY home improvement, and guide you through the steps to create a floating mantel shelf that is hung with a French cleat.
Whether you’re a seasoned DIYer or just starting out in your home improvement journey, our step-by-step instructions, tips, and creative ideas will help you create a stunning focal point that merges functionality with good looks.

When we moved into our house last year I was so happy that we had a fireplace. I really like the stone but there’s a lot of it, and there isn’t a mantel.
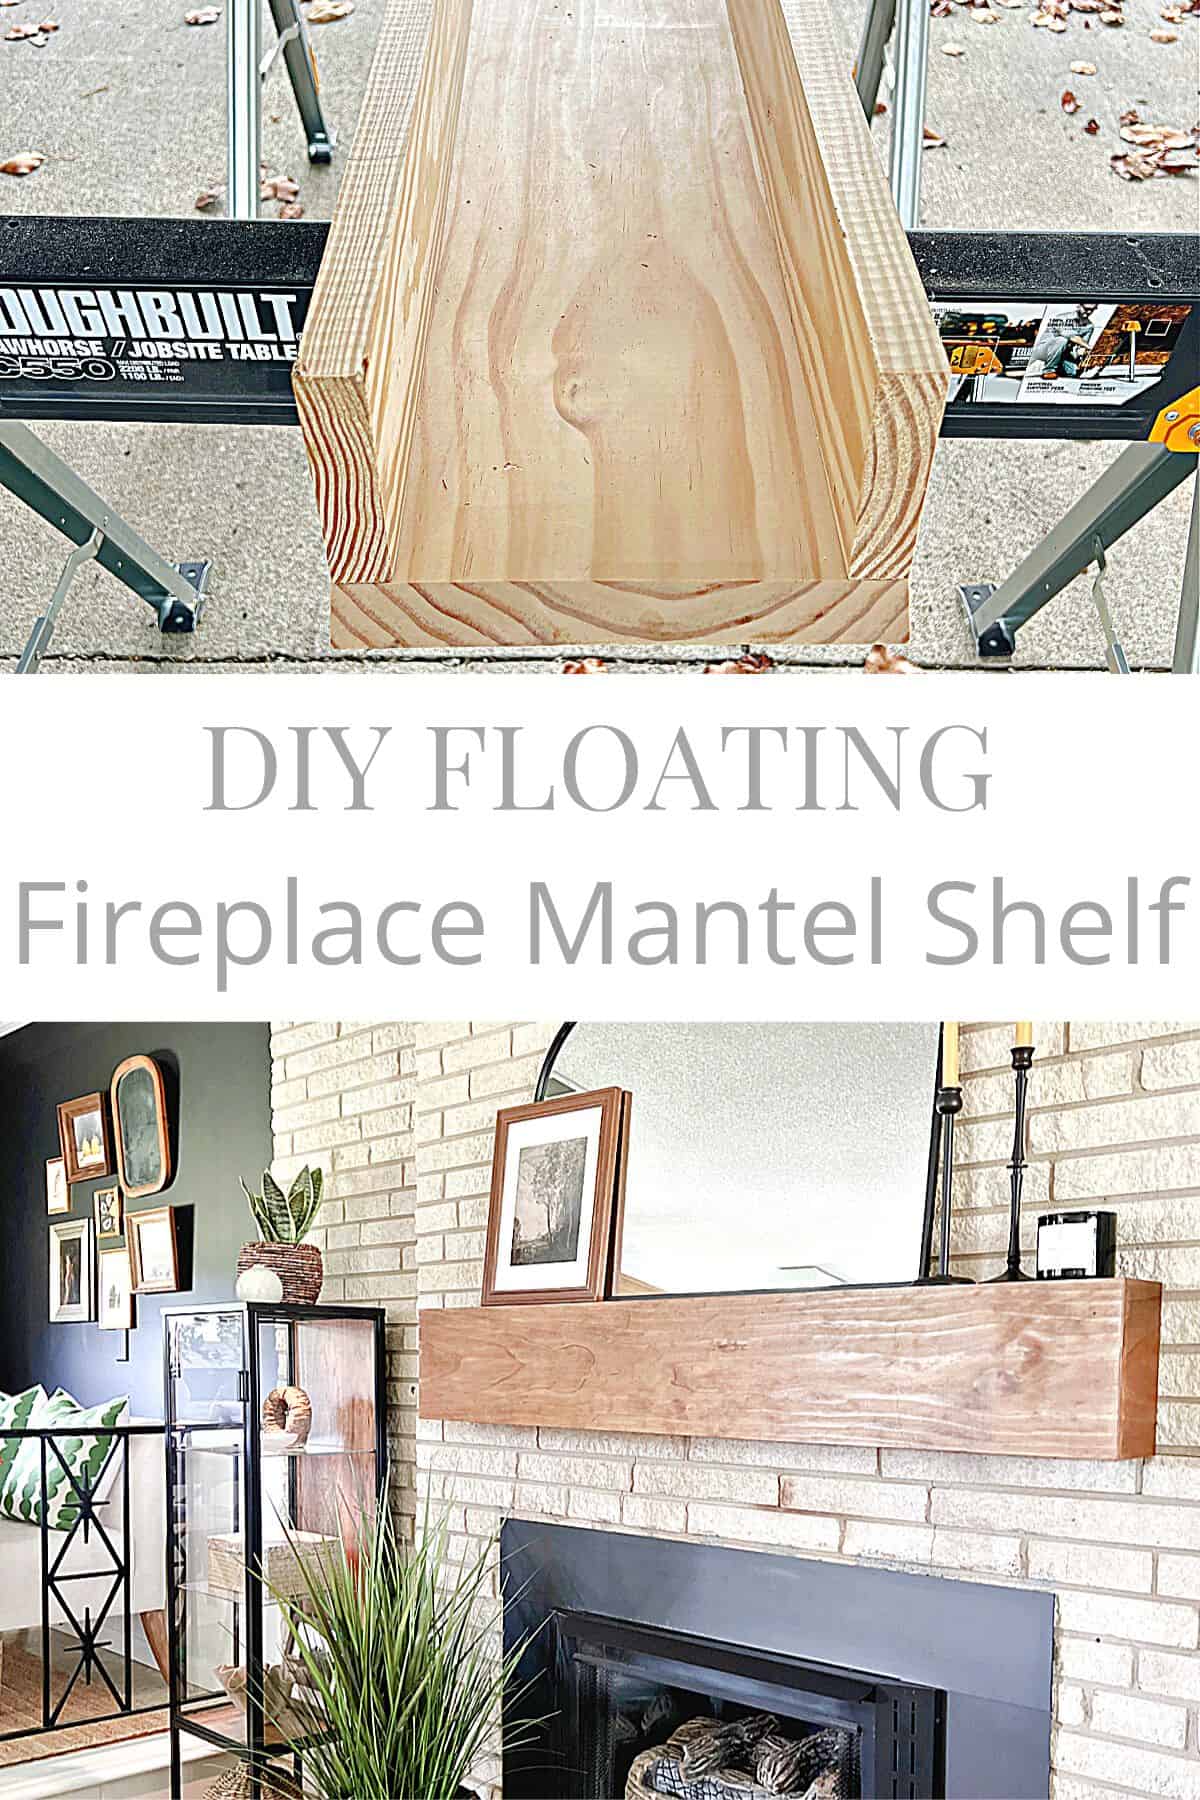
I knew that we could easily fix that by building a beautiful new mantel with just a few pieces of pine.
If you’re looking to beef up an existing mantel in your house, check out how I did it in our little stone cottage.
There were several discussions about building a full-on fireplace mantel or trying to find an old beam to hang but, in the end, we went with a simple DIY floating mantel. Something that was just enough to break up the stone wall, plus provide space for a few decor pieces.

Supplies needed:
- 1x10x8′ pine board
- 3, 5/4 pine boards
- wood glue
- 1 1/2″ GRK finish screws
- Tapcon screws
- wood putty
- sand paper
- wood stain
Tools needed:
- chop saw
- tape measure
- drill
- Kreg pocket hole kit
- clamps
- table saw
Building a shelf mantel with pine wood
To keep this project budget-friendly, and as simple as possible, we used 4 pieces of pine. The long piece was bought at the home improvement store just for this project but the 3 other pieces were leftovers from another project.
Besides being easy to build, my goal was to keep it looking simple and streamlined, which meant mitered corners and no visible screws. It was easy enough to achieve this with a chop saw, for the mitered corners, and a Kreg pocket hole kit, to hide the screws.

The first step of the build was to measure the fireplace. While figuring out the placement, I made sure I kept the new mantel high enough so it wouldn’t get too warm from the burning fireplace, about 24″ from the firebox.
With the measurements in hand, I marked off the 1×10″x8′ piece of pine and cut it to about 61″. Then I cut each end at a 45 degree angle with the chop saw.

Next I cut the side pieces out of the leftover 1×10. Each side piece had one straight end and one at a 45 degree angle.

I wanted the completed mantel to be on the shallow side so each side piece only measured 5 1/4″ long.

After the front face and sides were cut, I used the chop saw to cut down 2 of the 5/4 boards, which were used for the top and bottom of the mantel.
We chose not to do 45 degree cuts on the top and bottom pieces.
This was done for a couple of reasons. #1, because doing a 45 degree angle on a 6′ long piece of wood is tricky, and we only had a chop saw for this project. #2, once the mantel is complete and hung, you really wouldn’t be able to see the top or bottom unless you were straining your neck to check.

After the wood was all cut for the mantel we started assembling it.
First we marked our top and bottom 5/4 pieces for screw placement. Then we used the Kreg jig to create the holes for the screws. This was my first time using it and, I’ll admit that I was a bit intimidated but it really was so simple to do.


After all of our holes were drilled, I spread wood glue the length of the top and bottom board and positioned them on the main face board.
Then I clamped the top board to the face board, to keep it straight, and drilled in the screws. Once the top board was attached, I did the same with the bottom board.

Next I attached each side piece.
Since the side pieces and face board were cut at 45 degree angles we had to find a different way to secure them.
We decided to make a block out of scrap pieces of wood. We glued and screwed it into the inside of the side piece of the mantel, as well as the inside of the face piece. Each side of the mantel was secured this way.


That’s it for the construction of the mantel.
The next step in this build is to make a French cleat to hang the mantel on the fireplace. This will make it very sturdy and easy to remove if we ever need to do so.
What is a French cleat?
Simply put, a French cleat is a hanger for something heavy, like a mirror, cabinets or, in our case, a mantel shelf. You can DIY a French cleat yourself with a piece of wood or buy one ready-made.
If it’s made out of wood it will be two halves of a piece of wood that’s ripped down the length of the board. Each piece is beveled to 45 degrees.

One side of the wood is attached to the wall (preferably in studs) with the bevel facing up, the other half is attached to the piece that you will be hanging up, bevel facing down.

When you hang your piece up, you slip whatever it is you are hanging in the wall mounted cleat. That’s it!
Making a French cleat
To make the French cleat for our mantel, we cut the last 5/4 board in half lengthwise on a 45 degree angle. Because this piece is so long, nearly the length of the mantel, we decided to cut it on our table saw.
One half of the cleat will be attached to the stone on the fireplace while the other will be attached to the mantel.
The piece that we attached to the mantel needed to be glued and screwed to the back side, so we used the Kreg jig to create our screw holes. Make sure the cleat is bevel side down.

With one half of the French cleat attached to the back of the mantel, we secured the other half, bevel side up, to the fireplace with tapcon screws.
Just a word of warning to make sure your screws are secured tightly so that it will hold the weight of your mantel. We had to screw into the mortar and it took a few tries to get it really secure.

Don’t Forget!
Use the right kind of screws and make sure you secure them in a stud when attaching a French cleat to a wall.
I did a test fit with the new mantel on the French cleat and then it was time to putty the seams and stain the wood.

I went with a lighter wood stain to go with the rest of the wood tones my living room.

I love it!
It doesn’t overpower the fireplace, or our long and narrow living room, and adds a bit of rustic charm to the stone wall. Plus I’m able to decorate it for the seasons.

