Fireplace Update with Peel & Stick Tiles

A quick and easy fireplace update with removable peel and stick tile stickers on a fireplace hearth.
There’s nothing more satisfying than doing a quick update in your home for a whole new look and a brick fireplace offers that opportunity.
You can change the look of it with paint, tile, a fireplace screen or a new mantel.
Our old fireplace has been through a series of updates since we moved in 5 years ago, including new paint, a DIY fireplace mantel and a DIY fireplace screen, and it’s looking better than ever.
But, there was one more update I’ve been wanting to do.

How to Modernize a Brick Fireplace on a Budget
First thing we did was to beef up the narrow mantel with a new and much improved fireplace mantel so that we had a place to put our tv.

Then we painted the brick fireplace and surround white and I made a birch log fireplace screen.

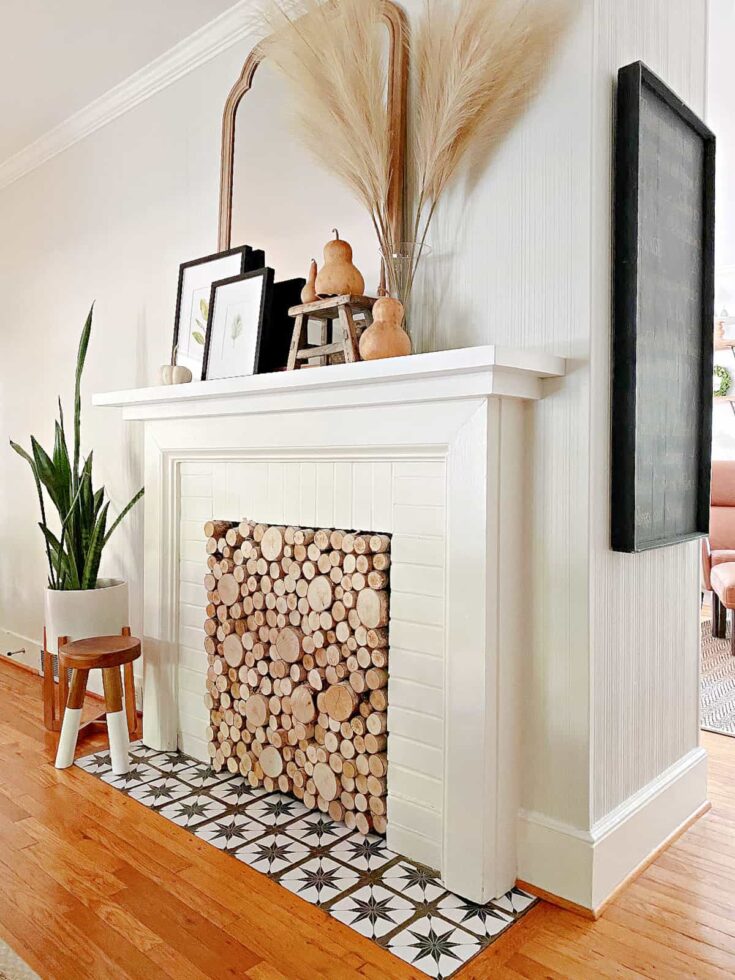
The last update on the list was to fix up the old tile on our fireplace hearth.
Our cottage is 80 years old, which means the tile is 80 years old. They’re in good condition for their age but I really wanted a new look.

I didn’t want to mess with removing tiles and retiling so I looked into vinyl tile stickers. Not only do they look good but they are a super cheap alternative to real tile.
It’s the same idea as removable wallpaper but it’s stickers for each individual tile.
Some quick facts about vinyl tile stickers
- removable/easy to reposition
- waterproof
- easy to apply
- durable
- heat resistant
- nonflammable
Let’s take a look at how easy it is to do a quick fireplace makeover.
Supplies needed
- trisodium phosphate (cleaner)
- rubber gloves
- vinyl tile stickers
- exacto knife
- straight edge
- cutting board or mat
- pencil
- smoothing tool
Ordering Peel and Stick Fireplace Tiles
The first step to vinyl tiles is finding a style that you like. I found my vinyl tile stickers on Etsy.
Next, measure your tiles. If you have grout, don’t measure the grout.
These tile stickers work best on a smooth surface so you want to make sure your tiles are smooth.
Count how many you tiles you will need (plus a few extra).
My tiles are 6×6 each and I needed 20 so I ordered 24.
Prepping the tile
Once my peel and stick tiles were delivered it was time to prep the fireplace hearth.
With this project prep is key.
You need to thoroughly clean the tiles to remove any dirt and soot with a bucket of warm water, trisodium phosphate and rubber gloves.

This is an important step because if your tiles aren’t clean, the tile stickers either won’t adhere or won’t stick for long.
Applying vinyl tile stickers
Once the tile is completely dry you can start to apply your stickers.
I tackled the “easy” tiles first (the ones that didn’t need to be trimmed).
I simply peeled back half of the tile backing and lined it up on the tile.

When I was happy with the placement I used the smoothing tool to smooth it out the rest of the way, while removing the rest of the backing.

It’s as easy as that!
I quickly moved on to the other tiles that didn’t need any trimming and applied the stickers.

With the easy part done, I started on the stickers that needed to be trimmed.
This actually turned out to be super easy, too.
I simply laid the sticker on the tile and used a pencil to mark each end where the grout line was located.

Then I moved the sticker over to the cutting board and used a straight edge to connect the lines.
Next I cut the sticker with an exacto knife and straight edge.

I did a dry fit on the tile to make sure it fit and applied the sticker.
Just make sure you smooth out the sticker.
Remember, you can reposition the stickers if you aren’t happy with the placement. I had to do this a few times during the process.
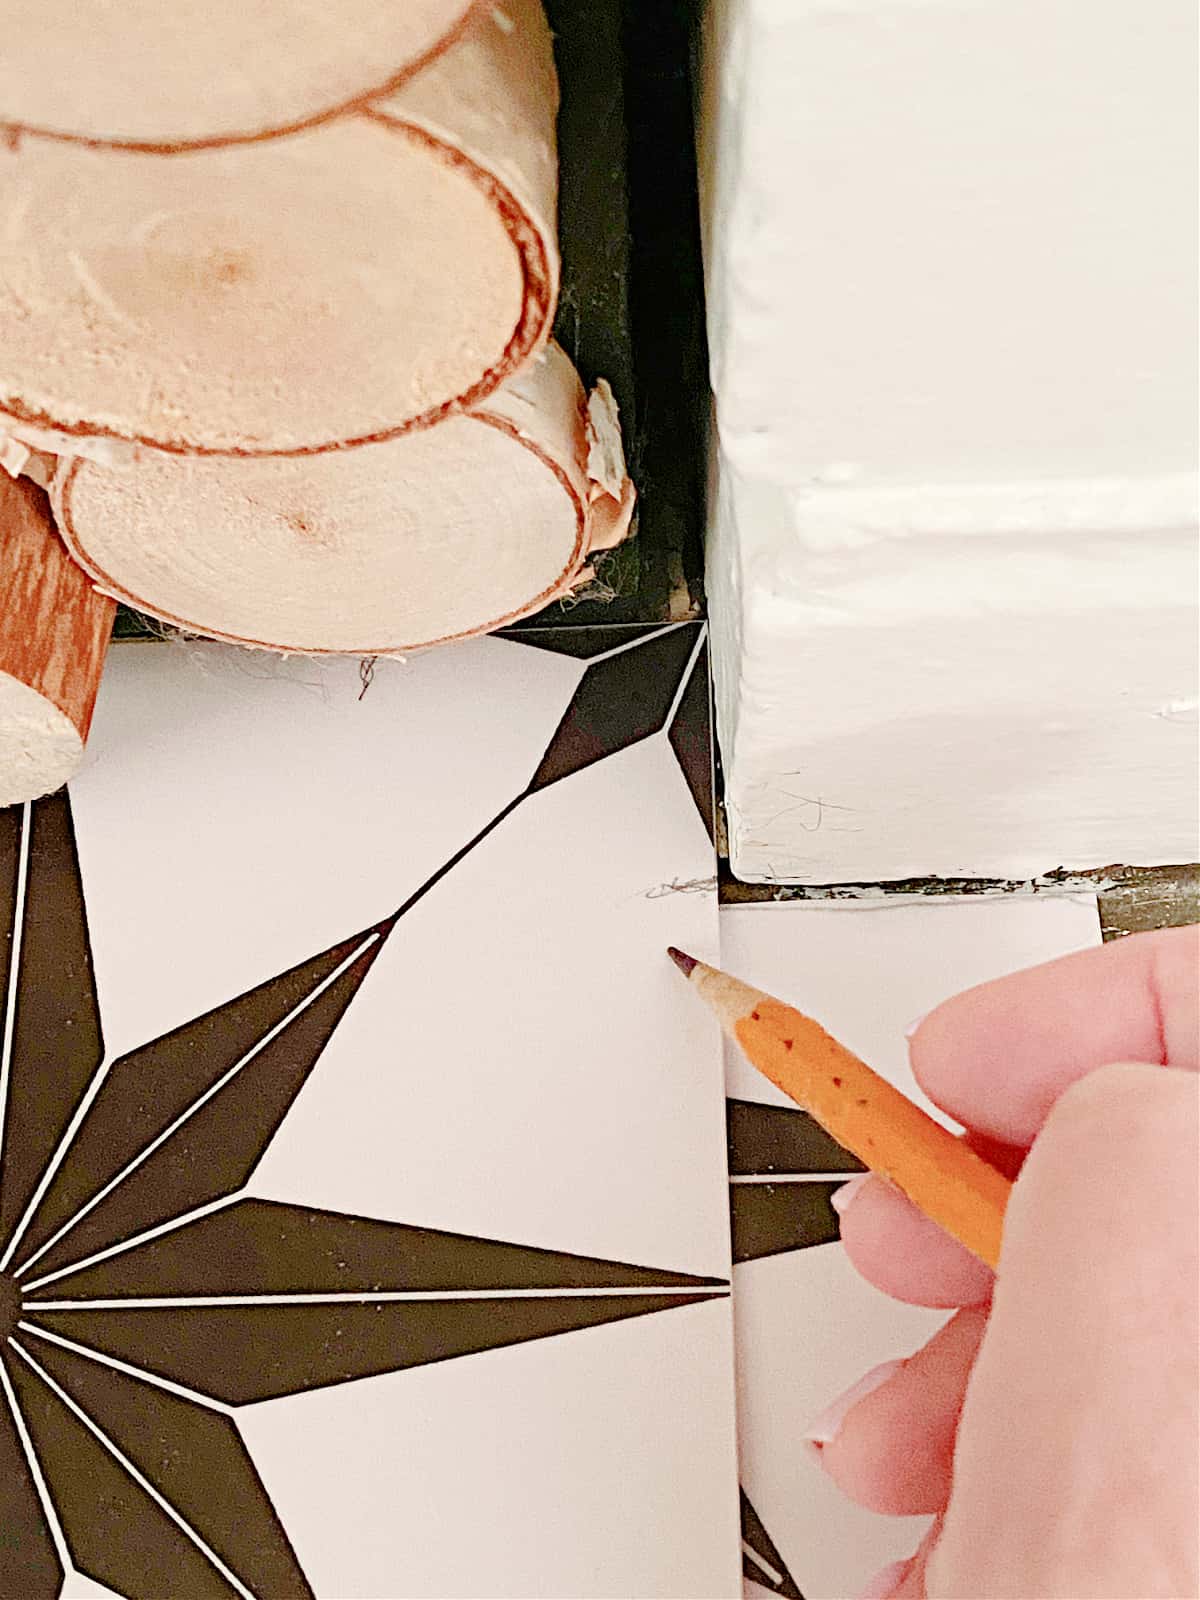
The last few tiles left were the ones that had to be fitted around the brick surround.
To do this I took a tile sticker and lined it up next to the brick.

I used my pencil to mark where the edge of the brick was and then I moved the sticker to the other edge and marked that.

With the marks made, I went to the cutting board and used the straight edge and pencil to create the lines for my cut.

The exacto knife made quick work of the corner cut.

Again I dry fitted the sticker and then applied it to the tile.

In about 30 minutes I had all of the vinyl stickers applied to the ceramic tiles.

With the dark gray grout it’s really hard to tell that they aren’t real tiles.

This was my first time using a product like this so I can’t speak for their longevity.
I have vacuumed over them several times, the dogs have run across them and my robot vacuum has passed over them almost every day and they still look like new.
I’ll let you know how they wear over time.
So for this project I spent just under $30. Definitely way cheaper than real tile and a super fast install.

Fireplace Update with Vinyl Tile Stickers
How to update an old fireplace in under 30 minutes with vinyl tile stickers to create a whole new look.
Materials
- trisodium phosphate
- rubber gloves
- vinyl tile stickers
- exacto knife
- straight edge
- cutting board/mat
- pencil
- smoothing tool
Instructions
- Measure tiles and order stickers
- Clean tiles well with hot water and soap or TSP
- Once dry, apply stickers that do not need to be trimmed
- Peel backing off halfway, position sticker on tile and apply using smoothing tool
- To trim stickers, lay sticker on tile and mark where the grout lines are
- On a cutting mat, use a straight edge and exacto knife to trim tile sticker
- Apply sticker on tile, use smoothing tool
- To apply stickers to tiles that are cut around trim, mark sticker where trim meets tile

- Use straight edge and exacto knife to trim sticker
- Apply sticker using smoothing tool
- Enjoy!