Home » Projects » Kitchen Reno: Raising a Window Sill

Kitchen Reno: Raising a Window Sill

This post may contain affiliate links, please see our policy for details.

We have been pretty busy with the kitchen remodel the past few weeks.

Both soffits have been removed and sheet rocked (you can read about it here) and the cabinets are getting painted.

This past weekend was spent moving a window sill up to match the window over the sink.

Raising a window sill and patching a large hole. An easy DIY for anyone. www.chatfieldcourt.com

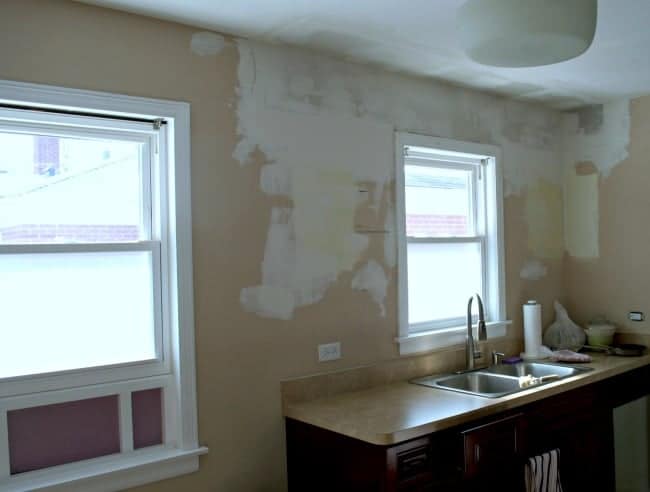
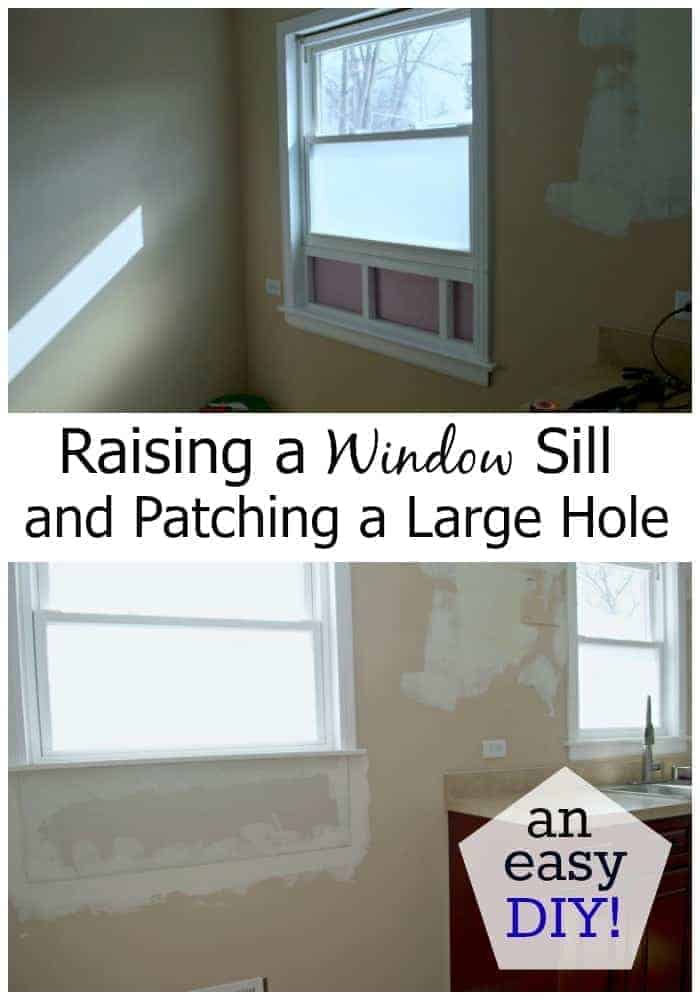
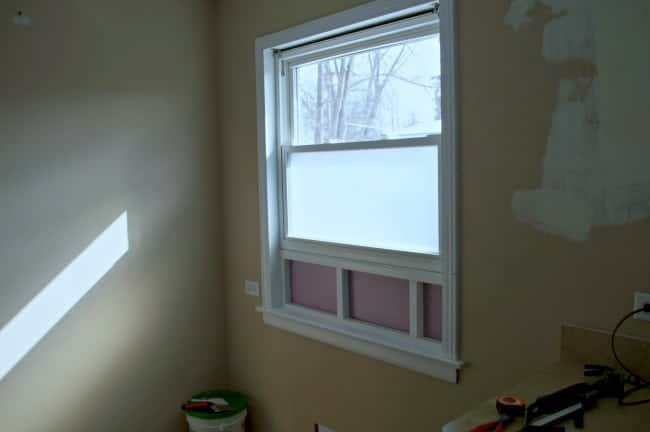
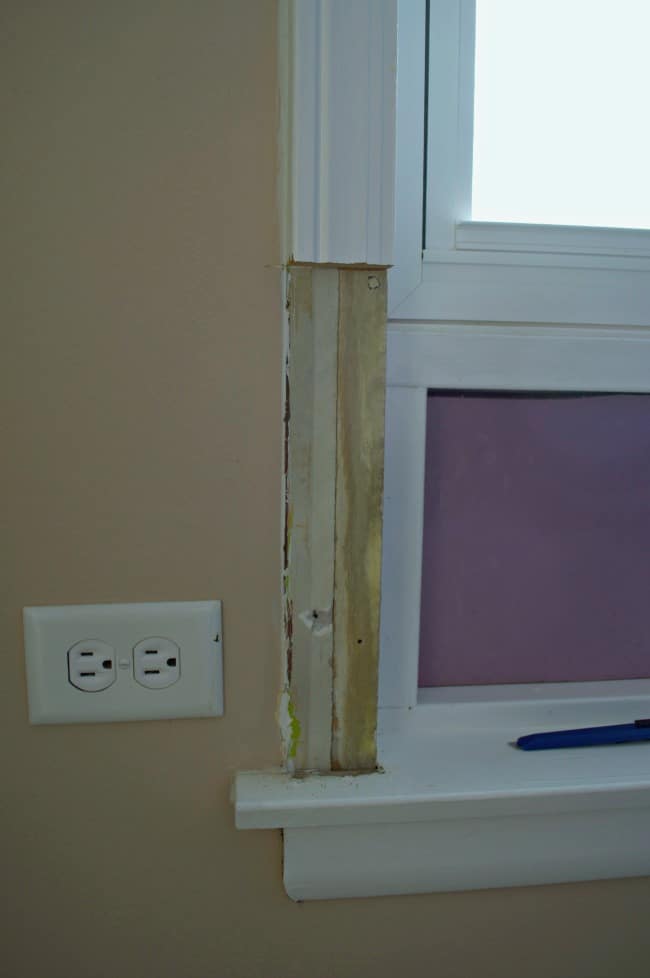
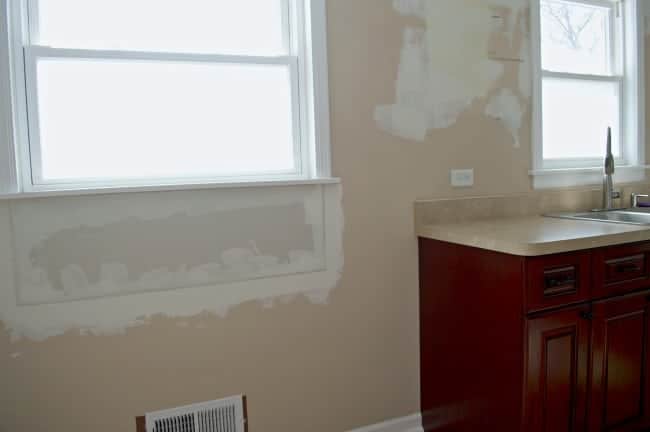
Not a very pretty picture, actually it’s downright ugly, but we are knee-deep in the middle of this reno. 😉  If you look at the window on the left you will see that the sill is really low.

At one time there was an a/c unit in there, which has since been removed and boarded up. We put the purple insulation in the holes to keep the cold out knowing that the window would eventually be redone.

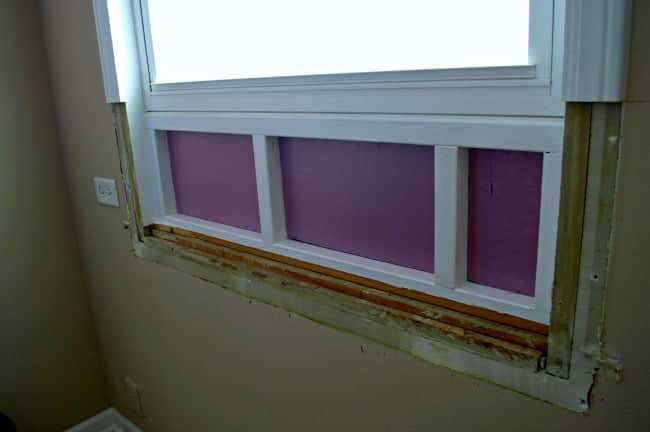
The plan for this side of the room is to build cabinets and to extend the countertop all the way down the window wall. In order to be able to do that the sill must be raised and the hole covered up.

Besides filling in this unsightly hole, the sills of both windows on this wall will actually sit at the same level.

A kitchen window

The first thing we did was to make a level line to the bottom of the sill of the window over the sink using a 2×4, a level and a square.

Raising a window sill and patching a large hole. An easy DIY for anyone. www.chatfieldcourt.com

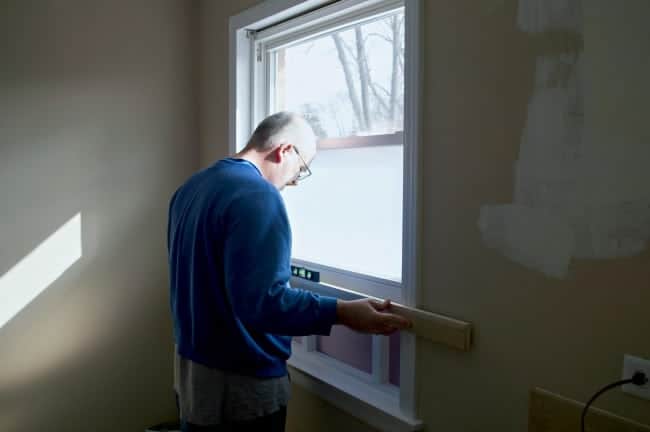
Once we marked off the placement of the new sill, hubs used a small hand saw to cut the trim, being careful not to cut up the wall.

Next he pried the trim from the wall, which came off easily.

Raising a window sill and patching a large hole. An easy DIY for anyone. www.chatfieldcourt.com

Next was removing the sill.

The original sill looked like it went under the frame of the window so we expected it to come off in pieces but, as luck would have it, it came off with no problems and in one piece, allowing us to reuse it and making this project a little bit easier.

Raising a window sill and patching a large hole. An easy DIY for anyone. www.chatfieldcourt.com

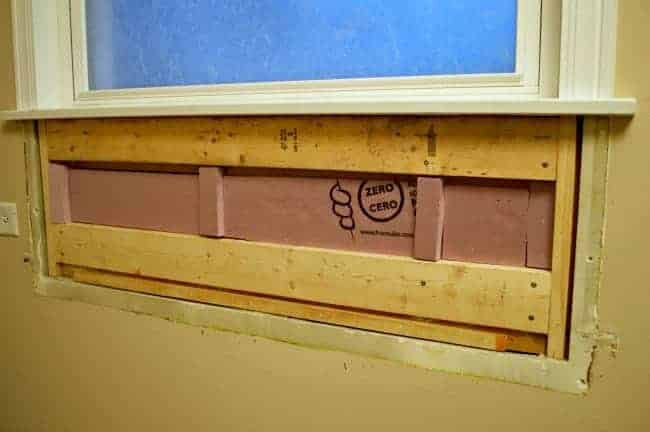
With all the trim removed and (a flush surface to work with) it was time to cover up this unsightly hole.

First we needed to add some wood to give the new sheet rock some stability and to give us something to screw into.

We also added some more insulation foam into the holes.

Raising a window sill and patching a large hole. An easy DIY for anyone. www.chatfieldcourt.com

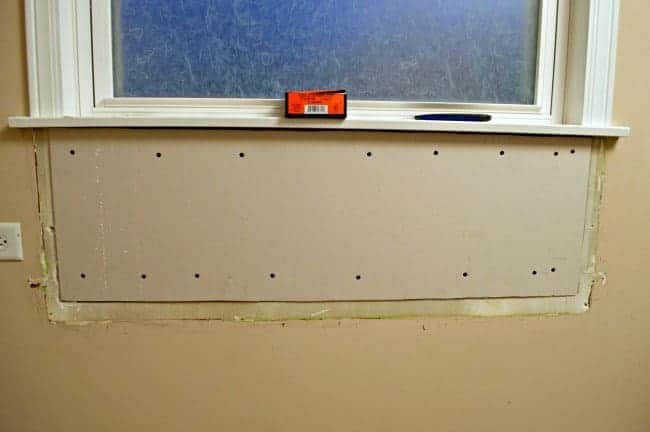
The old window sill was fitted back on the window in its proper place, which is now level with the window over the sink.

Time for sheet rock and spackle and this job is done.

We will work on sanding and smoothing this spot some but the new cabinets will cover the patched spot.

Raising a window sill and patching a large hole. An easy DIY for anyone. www.chatfieldcourt.com

The window has its first coat of spackle and the sill is now level with the window over the sink.

Raising a window sill and patching a large hole. An easy DIY for anyone. www.chatfieldcourt.com

Not the most exciting project ever but I was so happy to get to this project and have “the hole” covered up.

I’m still working on painting the cabinets and we took a shopping trip on Saturday to pick out our recessed lighting and planks for the ceiling (I don’t think I’ve told you that we were planking the ceiling).

More on all of that next time, along with a question about lighting.

I really enjoyed our shopping trip this weekend to pick out supplies. Would you rather shop for stuff for your home or for clothing and shoes? Do tell. 

Raising a window sill and patching a large hole. An easy DIY for anyone. www.chatfieldcourt.com

17 Comments

  1. Thanks for sharing your process.
    When you raised the window sill, what did you have to do on the outside to make the siding cover the “unsightly hole” without looking like a patch job?

    1. Hi Lars! The hole for the a/c was covered up when we moved in. The previous owners used wood and painted it white. It didn’t look awful from the outside but, of course, it didn’t match the brick that was on the rest of our house. Luckily the window was on the side of the house where you couldn’t really see it. Hope that helps.

  2. That looks great! We did the same thing in our kitchen… I had never seen such a thing done before that.

    1. Thanks!

      I’ve never seen it either. Our house was built in the 50’s so apparently, they built the window around the a/c.

      I appreciate you stopping by.
      K.

  3. I wondered the same thing as Debbie. Thanks for the update. 😉 Shopping for the home is much more fun! I like new clothes, but I love new things for the house. Only thing is, home shopping at Home Depot or Lowe’s just means projects for my hubby and he knows that! There is an island at Home Depot that I love and every time we are in the store I tell my hubs, “oh look, they’re holding my island for me.” Don’t think I’m ever gonna see it in my kitchen though. “sigh” Moving along, Kristi!

    1. Haha…your husband sounds like mine (mine thinks he the voice of reason). Maybe someday you’ll get your island.

      I’m surprised how enthusiastic my husband is with this kitchen reno. It’s totally out of character for him. 😉 He usually does stuff but will moan and groan the whole time. Not this time, so I’m getting all I can out of him while this lasts.

      K.

  4. I would rather shop for my home than clothes. You are coming along great with the remodel. One question, How are you going to handle the vent below the window? Maybe I am jumping the gun but wondering. Debbie

    1. I would rather shop for my home too Debbie, much more fun. As for the vent, we will be routing it to come out of the kick plate of the cabinets by either using flexible duct work from the wall or cutting a hole in the floor to reroute it. I don’t think we’ll be cutting in any holes in the floor since it’s not getting replaced and it’s tiled but it can be done that way. Hope I explained all that ok. Thanks so much for the question.

      K.

  5. Pretty nice that the window sill came off in one piece – yay! You are going to end up with a much better use of space. It’s coming along!

    1. I’ll tell you that we were more excited than we should have been. 😉 It’s the little things that make us happy.

      K.

    1. I’m with you Lynne. At least you don’t have to try anything on when you’re shopping for your home, that’s the worst part. 😉

      K.

      1. Deni O'Quinn says:

        Hi. How much work was it to replace the receptacles with GFI receptacles? What did you do with the vent near the floor?

        1. Hi Deni. According to my husband, who is an electrician and electrical engineer, if you have a ground in the receptacle then it will be fairly easy to replace. If there is not, you would have change the wiring to the receptacle. Obviously more work. Older houses tend to not have a ground wire. It all depends on the wiring in your house.

          Hope this helps a little bit. Thanks for stopping in.

Leave a Reply

Your email address will not be published. Required fields are marked *