• Skip to main content
  • Skip to primary sidebar

Chatfield Court logo

menu icon
go to homepage
  • DIY
  • Crafts
  • DIY Plans
  • Subscribe
subscribe
search icon
Homepage link
  • DIY
  • Crafts
  • DIY Plans
  • Subscribe
Γ—

Home Β» DIY

updated: Dec 28, 2018 by Kristi 12 Comments

DIY Deer Head Doormat

  • Share
  • Tweet
  • Email
Disclosure: As an Amazon Associate and member of other affiliate programs, I earn from qualifying purchases.

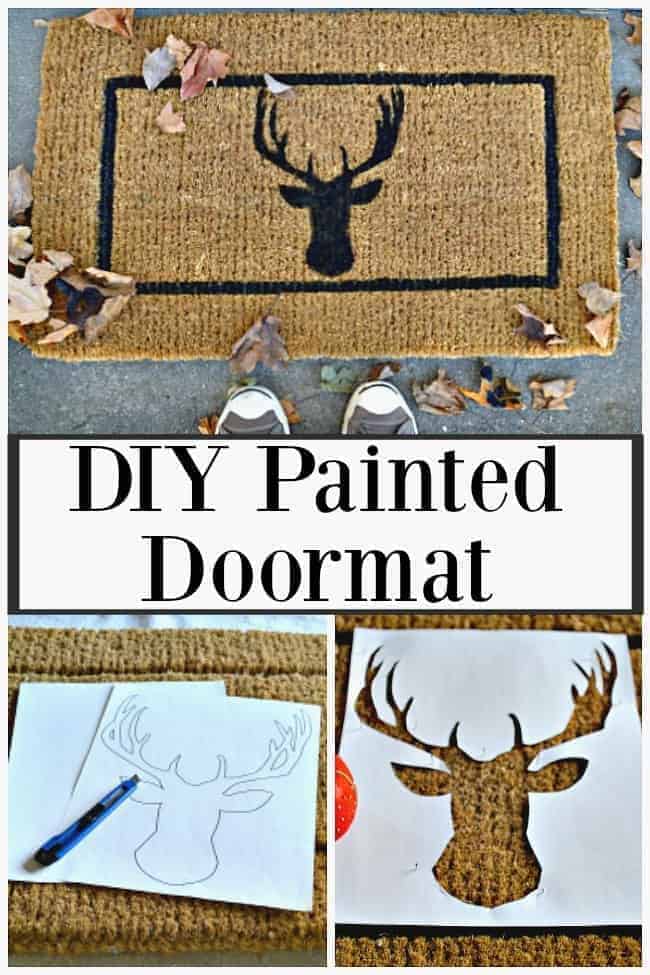
A DIY deer head doormat made with a homemade stencil.

I hope you're ready for Christmas projects, because I've been busy cranking them out (well, they're not all finished but I have been busy starting as many as I can and then leaving them lay all over the house 😉 ). One project that I have been able to finish was this quick and easy DIY deer head doormat.

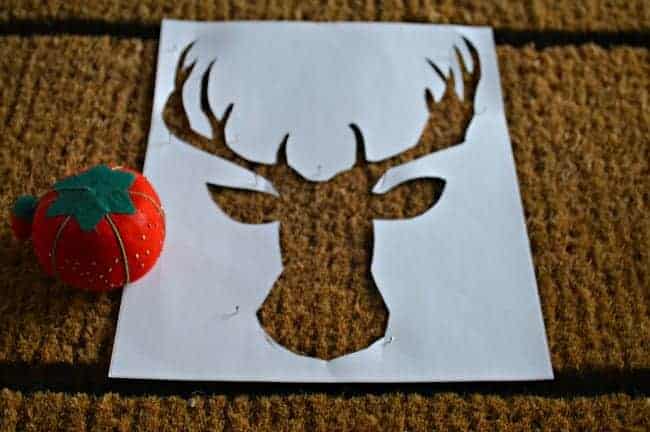
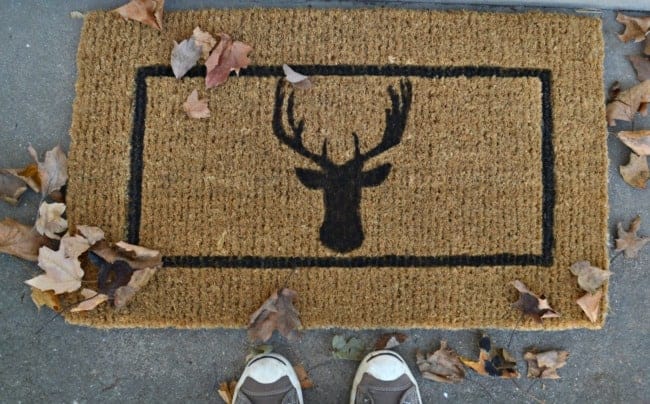
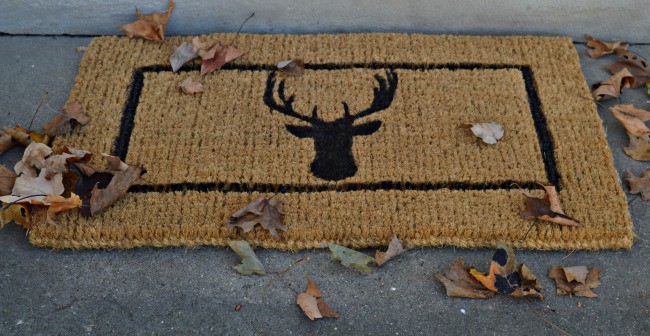
A collage with a finished DIY deer head doormat, a stencil on a door mat and a deer head stencil cut out of paper

I desperately needed a new doormat and when I found a plain coir doormat, I knew I could add a little something to it and it would be perfect for my front porch. I've been itching to use a free deer head printable that I found online last year, and this was the perfect project for it.

I wanted this project to be as inexpensive as possible so I used things that I already had on hand... 

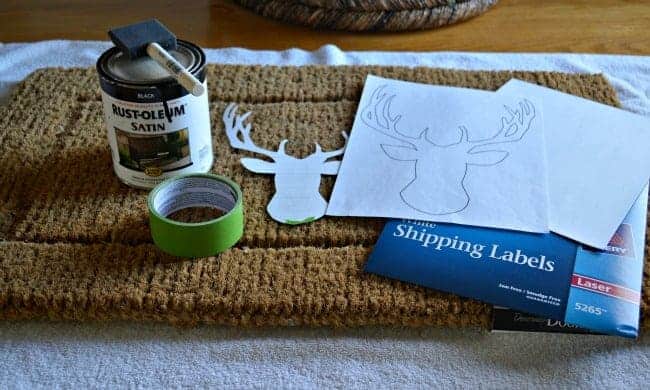
Supplies to make a DIY deer head doormat:

*This post contains affiliate links.

picture of outside of house and windows
OUR EMAILS ROCK!

Subscribe to get the latest in DIY Projects and exclusive subscriber access to our Resource Library!

        • Rust-Oleum black paint
        • a foam brush
        • painter's tape
        • a deer head silhouette
        • straight pins
        • shipping labels
        • coir doormat

DIY deer head doormat supplies. | www.chatfieldcourt.com

I've used shipping labels before, when I did my dog silhouette project, and they worked out really well so I went with them again. They are thicker than the printer paper so it makes it easier to use as your stencil.

The first thing I did was to print out the deer head silhouette. Then I placed the printed sheet on top of the shipping label and, using a razor knife, I carefully cut out the deer head.
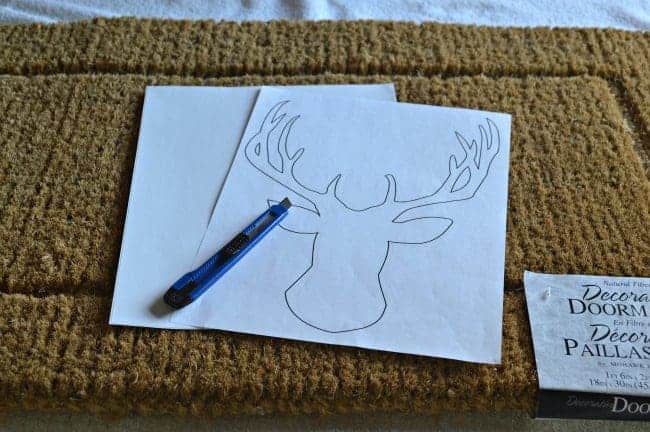
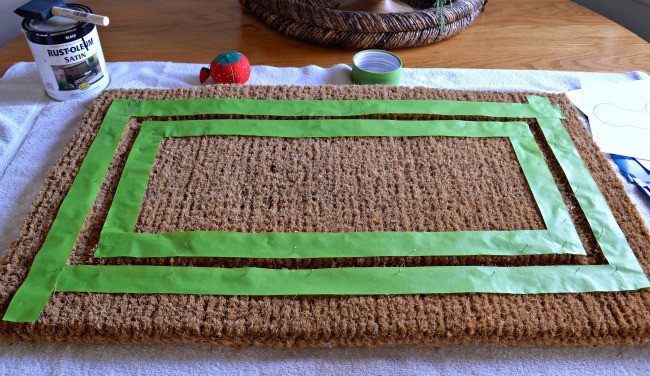
DIY deer head doormat printable and shipping label. | www.chatfieldcourt.comOnce the deer head was cut out, I was ready to start painting. There was a channel in the doormat so I used it to make a painted frame around my deer head. You can skip this step but, because I'm a bit of a perfectionist, I used painter's tape to keep my lines straight.

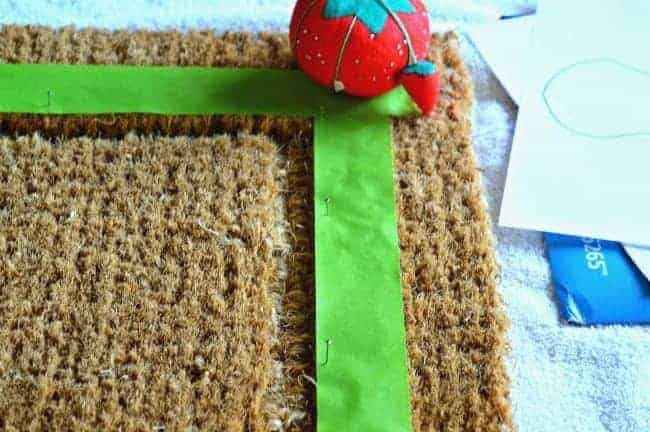
DIY deer head doormat prepping with painter's tape. | www.chatfieldcourt.comIf you've ever stepped on one of these doormats then you know that they are stiff and course and tape doesn't want to stick to it, so I used straight pins to keep it from moving around while I was painting.

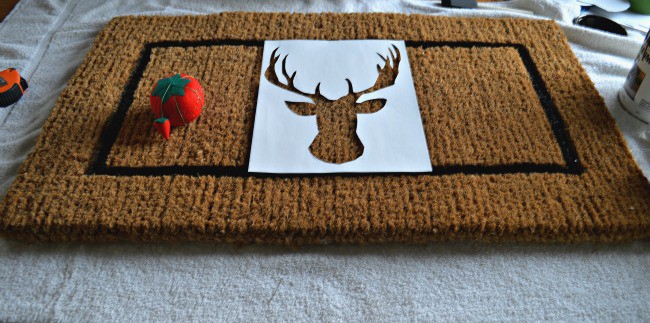
DIY deer head doormat painter's tape pinned to mat . | www.chatfieldcourt.comOnce it was taped and pinned, I painted the "frame", removing the tape as soon as I was done. Next, it was time to do the deer head. I placed the shipping label on the mat, centering it in the frame, and pinned it to keep it in place.

DIY deer head doormat deer head stencil. | www.chatfieldcourt.comDIY deer head doormat deer head stencil pinned to mat. | www.chatfieldcourt.com

Stippling with the brush, I painted the deer head. I had to work a little to get the paint into the coarse fibers, but it covered well. As soon as I finished painting, I removed the stencil and let the doormat dry.

I love how it looks on my front porch.

DIY deer head doormat painted and on the front porch. | www.chatfieldcourt.com

DIY deer head doormat completed and on the front porch. | www.chatfieldcourt.com

Now I need to decorate the rest of the porch to go along with my new deer head doormat. Have you started your holiday decorating yet?


« New Kitchen Light
Custom DIY Range Hood »

Sign up and get exclusive access to our Resource Library with our Freebies!

Reader Interactions

Comments

  1. Nancy says

    December 22, 2015 at 9:36 am

    Oh, I'm so behind in reading your fabulous blog, Kristi. I have to play catch up today. Taking a blogging break, so this gives me time to visit my sweet friend. πŸ™‚ I LOVE the doormat. So clever, and I"m pinning to remember how you did this. Hugs, Nancy

    Reply
    • Kristi says

      December 23, 2015 at 12:39 am

      Awww, thanks so much Nancy, and I appreciate the pin. Enjoy your blog break. πŸ™‚

      Reply
  2. Kim says

    December 05, 2015 at 5:51 pm

    Fabulous! I think that even I could manage this one!

    Reply
    • Kristi says

      December 06, 2015 at 2:29 am

      Thanks Kim! It really was a super easy project.

      Reply
  3. Brenda, Florida says

    November 30, 2015 at 5:40 pm

    Looks good. Great idea using shipping labels. I can;t wait to see your house decorated for Christmas.

    Reply
    • Kristi says

      December 01, 2015 at 2:21 am

      Thanks so much Brenda. I tried using several things, but the labels just worked the best. Christmas house tour is coming soon so stay tuned. πŸ˜‰

      Reply
  4. dkhalcomb2 says

    November 30, 2015 at 9:05 am

    Your are so crafty. Cute simple door mat. I like simple. I do not decprate any more. About the most I do is buy a Christmas tree scented candle. It is only me and the dog, he doesn't seem to care. LOL I enjoy seeing the decorations others put up though. Have a great week. Debbie

    Reply
    • Kristi says

      December 01, 2015 at 2:16 am

      Awww, thanks so much Debbie. Hope you have a great week too! Thanks for stopping in today. πŸ™‚

      Reply
  5. Jessica [Havok] says

    November 30, 2015 at 9:57 am

    Ohhhh, I need to do this! We are in need of some doormats for inside the apartment, as it's starting to get gross out, and more and more leaves and things are getting in, as we have no good place to, well, stomp our feet, ha. And, I have a thing for deer and deerheads, so this would be the perfect thing! πŸ˜€

    Reply
    • Kristi says

      December 01, 2015 at 2:19 am

      Sounds like a doormat is in your future, and this one seems perfect for you. I'd love to hear if you make one.

      Have a great week! πŸ™‚

      Reply
  6. Phyllis says

    November 30, 2015 at 7:45 am

    Happy late Thanksgiving and a great start to a wonderful Christmas Holiday.

    Reply
    • Kristi says

      December 01, 2015 at 2:15 am

      Thanks so much Phyllis, same to you! I hope that you both are well and that you had a great holiday.

      Reply

Leave a Reply Cancel reply

Your email address will not be published. Required fields are marked *

Primary Sidebar

Kristi here…lover and doer of all things home, including DIY and home decor. I’m the voice behind Chatfield Court where I share easy, budget-friendly DIY projects, crafts and decorating tips in the hopes of inspiring others that they can do it too.

More about me β†’

Recent Posts

  • How to Hang Decorations on Vinyl Siding
  • Easy DIY Plant Stand
  • The Easiest DIY Rolling Plant Stand
  • An Easy Fix for an Off Center Ceiling Light

Search the blog

Footer

↑ back to top

More

About

Contact

Google Web Stories

Privacy

DIY & Home

Kitchen Remodel

Garden

Christmas

Fall

As Seen In

Buzzfeed

The Pioneer Woman

Country Living

Washington Post

Copyright Β© 2022 Chatfield Court