
Easy DIY Plant Stand
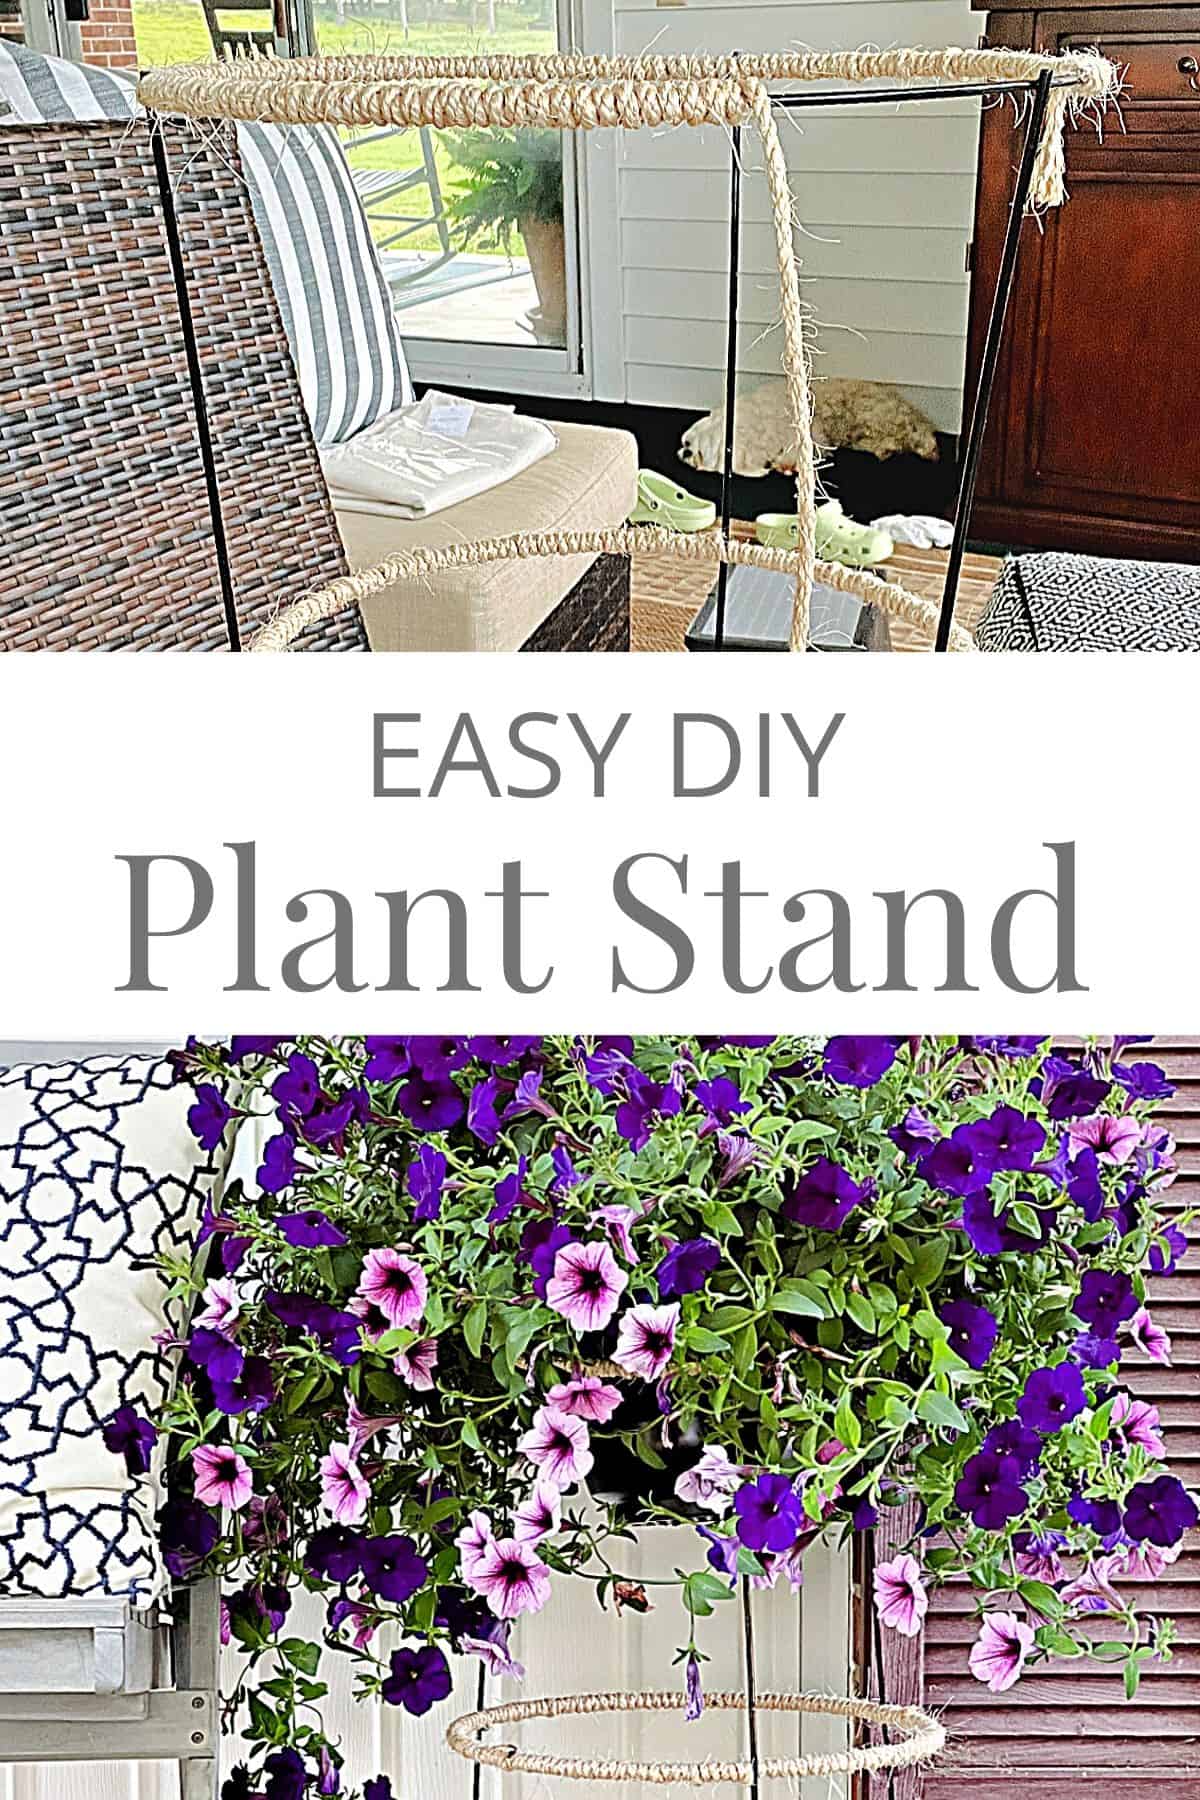
How to make a unique but very easy DIY plant stand out of a wire tomato cage and an old stainless steel milk strainer.
Are you looking for an unusual but totally doable plant stand for your front porch?
It’s as easy as picking up some twine, some kind of pot for a plant and a wire tomato cage from the home improvement store.

Why use a tomato cage and old milk strainer?
Well, the tomato cage was an easy choice. I used it for a similar project 9 years ago (way before it was a thing), so I knew it would make a great plant stand.
The milk strainer was a spur-of-the-moment decision.
I actually found the old, stainless steel milk strainer at a flea market 8 years ago and I had big plans to repurpose it into a hanging light.
Obviously that never happened so it sat in the basement collecting dust.
During our recent move, and a huge purge, I decided it was time to let it go. After putting it in the sell pile though, inspiration hit.
Why not make it into a planter?
It is deep and has drainage holes in the bottom. Actually it makes a great planter pot.
What can I use for an outdoor plant stand?
The possibilities are really endless.
I used a vintage milk strainer and tomato cage for my DIY outdoor planter but you could use a bucket or even a regular flowerpot.
Supplies
- wire tomato cage
- pot for plant (I used a vintage stainless steel milk strainer)
- spray paint
- cutting tool (I used an oscillating multi-tool)
- sisal or jute twine
- scissors
- hot glue gun
Making a DIY plant stand
When I made a plant stand with a tomato cage all those years ago you couldn’t find colors so I ended up spray painting it.
Nowadays though you can find any color. I picked up a black one and once I knew the milk strainer, erm flower pot, would fit, I went to work cutting the legs off with a cutting tool.

Next I turned my attention to the milk strainer that would become a flower pot.
Painting the “flower pot”
I did another quick fit in the stand before it got a thorough cleaning with the hose.

After the milk strainer was dry I turned it upside down and spray painted the outside only in a matte black.

Creating the plant stand
While the paint was drying I started working on wrapping the twine around the rings on the tomato cage.
You really don’t have to do this step but I wanted to add a bit of contrasting texture to my plant stand.
It’s easy to do but be warned…it does take a while to wrap all 3 rings with the twine. I had a few burned fingertips from the hot glue but it was definitely worth it.

I chose sisal for this project, because I liked the color, but it was really stiff, which made it harder to work with. If you want to wrap your cage, a more flexible choice would be jute twine.
Wrapping the twine couldn’t be easier.
I would just wrap it around a few times and then put a bead of hot glue on the twine. Then I’d wrap it around a few more times, 4 or 5 was usually the most I went before using more hot glue.
As I wrapped the twine I made sure to pull the twine to make it nice and tight.

I did this for each ring, making sure to start and stop the twine in the same place for each ring so I could hide the end points in the back of my plant stand.
So, let me share a quick tip that I learned.
I started wrapping the tomato cage with this big ball of twine. It didn’t take long for it to get tangled, causing a lot of frustration and a lot of time.

I needed a way to keep the twine neat and untangled so I decided to wrap it around something, kind of like thread on a spool.
I searched my decor closet and found a short candle holder.

Quick Tip: When doing a project with twine, use something like a candle holder to keep it neat and free from tangles.
Perfect for a temporary spool.
Once that was taken care of the project moved along quickly. Well, more quickly.

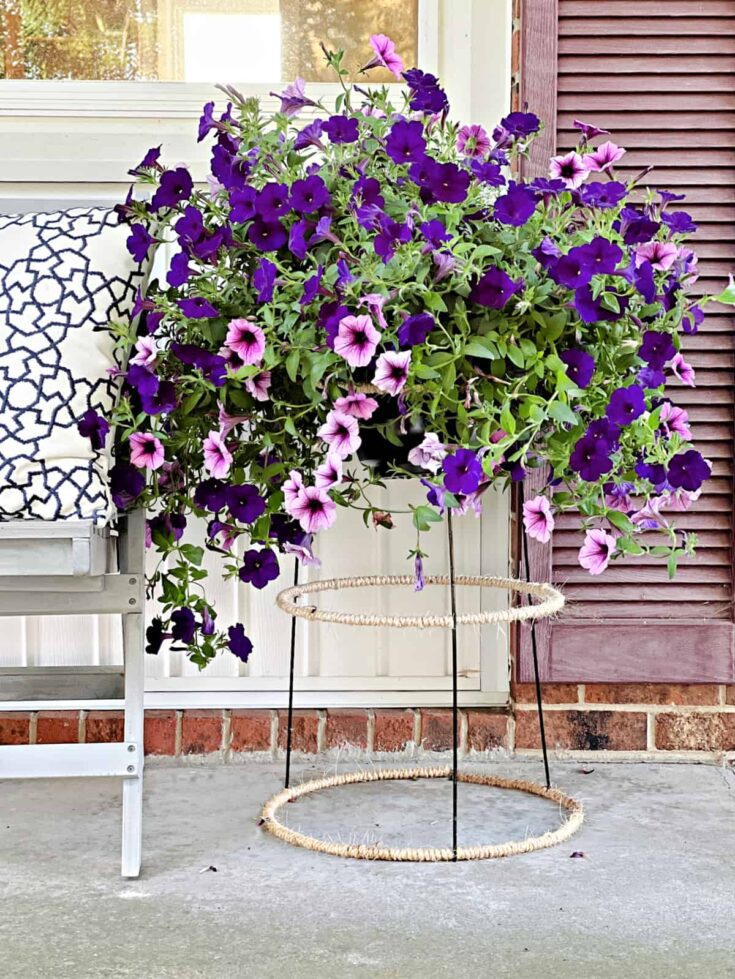
Once the planter stand is finished I filled the newly painted “flower pot” with soil and a pretty plant.
I popped it into the stand put it on our front porch.
I love it! A unique outdoor plant stand 8 years in the making, and a great way to repurpose old farm equipment.

More DIY Planter Ideas
Easy DIY Plant Stand
How to make a fun and unique plant stand to add to your outdoor decor. It's so easy to make with a tomato cage and flower pot.
Materials
- wire tomato cage
- pot for plant (I used a vintage stainless steel milk strainer)
- spray paint
- sisal or jute twine
- *wood candle holder
Tools
- cutting tool (I used an oscillating multi-tool)
- hot glue gun
- scissors
Instructions
- Make sure flower pot fits in tomato cage.
- Use cutting tool to cut off tomato cage legs
- Thoroughly clean pot and ready for paint (I used a vintage milk creamer so it needed a good cleaning)
- Spray paint outside of pot, milk creamer, in a matte black
- Let dry
- Begin wrapping twine around tomato cage rings
- Start twine and place a small dab of hot glue on twine to secure it
- Wrap tine around 4 or 5 times before adding another dab of hot glue
- Work your way around each ring (stopping and starting in the same area on each ring)
- *To keep twine from tangling, wrap it around something like a wood candle holder
- After you are done wrapping twine around all 3 rings, add dirt and plant to pot
Notes
Quick Tip: When doing a project with twine, use something like a candle holder to keep it neat and free from tangles.
