
The Easiest DIY Rolling Plant Stand
How to make a DIY rolling plant stand with scrap wood and locking wheels to hold and move heavy planters.
Do you have larger potted plants that need to be moved around for sunlight/shade, water or just a better looking spot?
This easy to make rolling plant stand is perfect for all of that.

I love to plant ferns and palms in my larger terracotta planters every spring. Inevitably I always end up moving them around during the season to get a bit of sun or rain, or because I just found a better spot.
If you’ve ever had larger potted plants then you know how difficult it is to drag the pot from one spot to another.
Instead of spending another spring and summer breaking my back trying to move my plants, I decided to make it easier and build a DIY plant stand caddy.
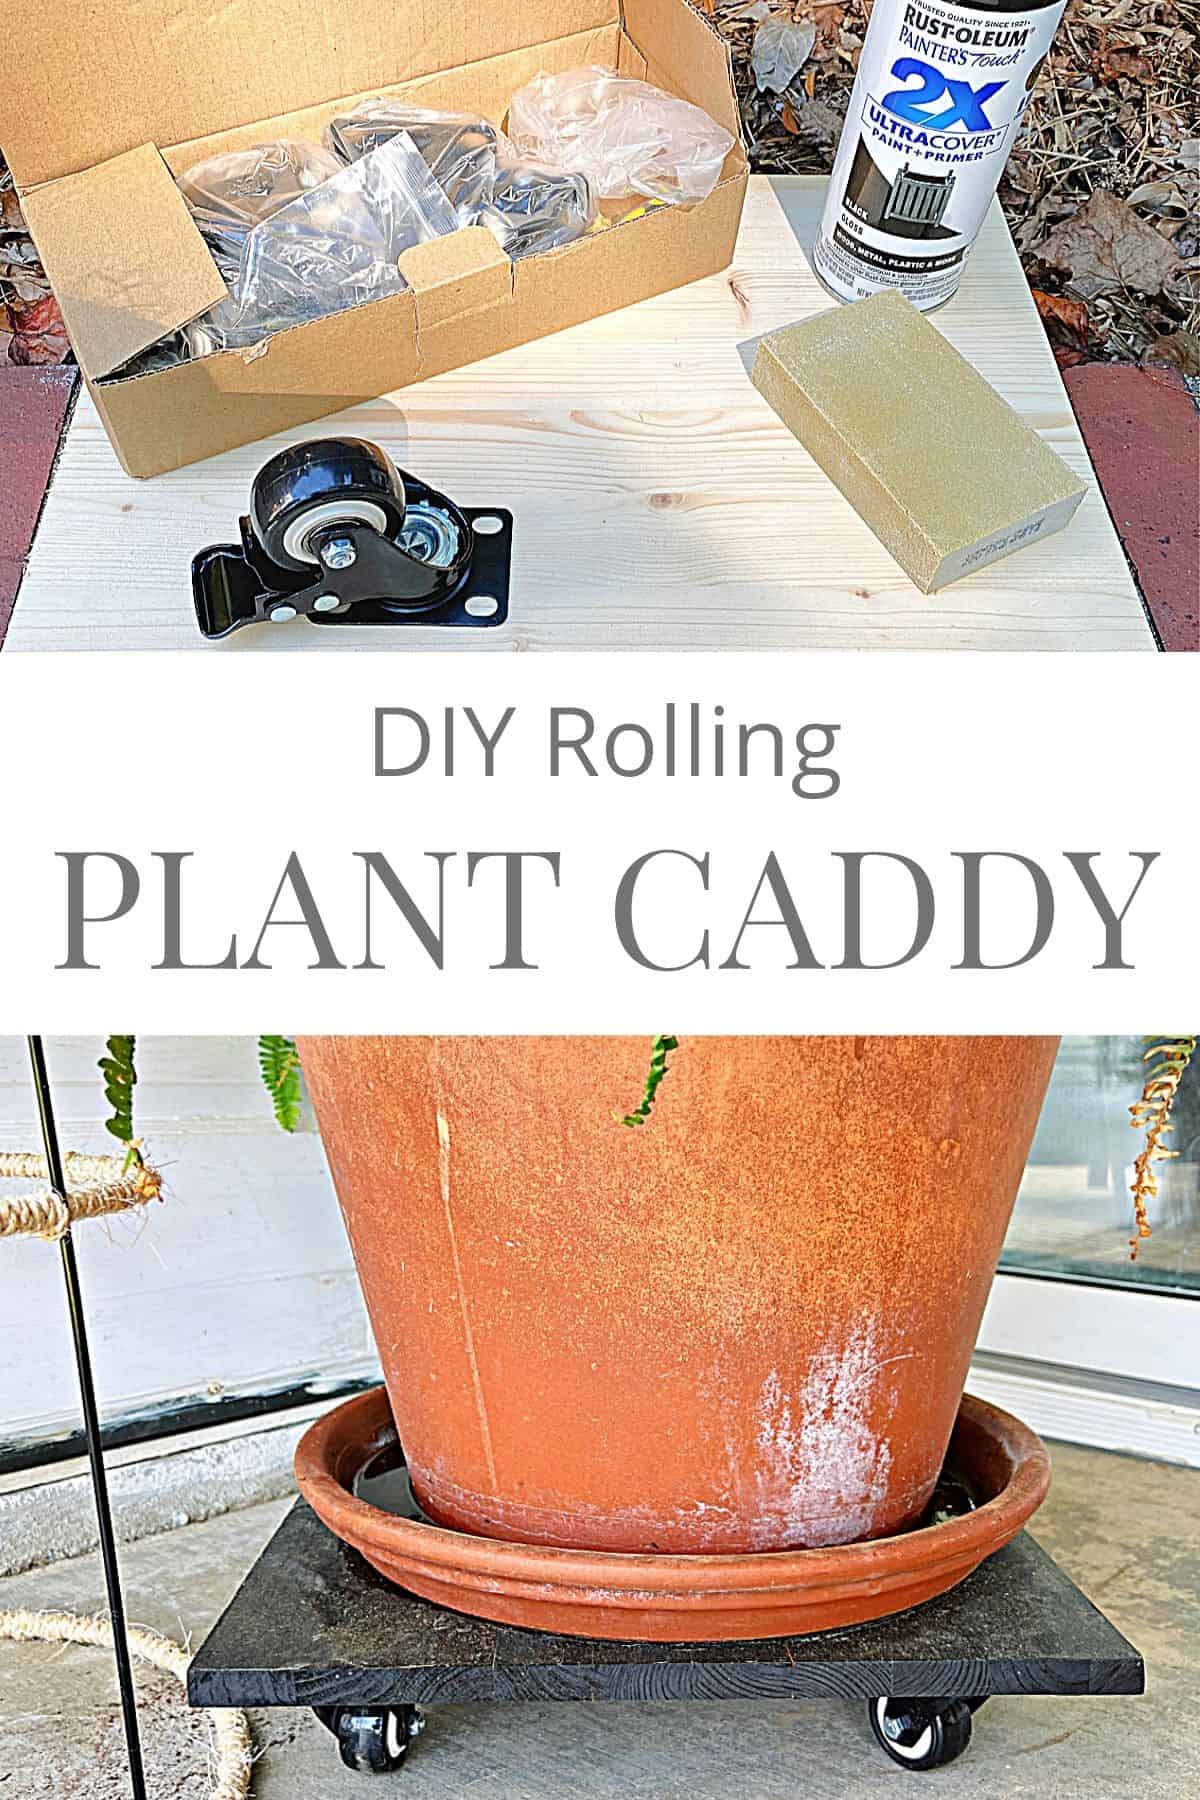
DIY Plant Caddy Supplies
- 3/4″ piece of wood (I used a leftover piece of pine scrap wood)
- miter saw
- tape measure
- sandpaper
- spray paint
- clean rag
- 4 locking caster wheels
- drill

How do you make a plant stand with wheels?
This is one of those DIY projects that’s really super easy to do.
I started by using my miter saw to cut a scrap piece of pine down to the size I wanted.
Before I cut though, I wanted to be sure that my biggest flower pot and saucer would fit so I placed the saucer on the piece of wood, and added a few inches all around for good measure.
After the wood was cut, I used my sanding block to sand the top and the edges smooth. I used a clean rag to wipe the dust off the wood.

Then I covered the top of the wood and edges with a coat of spray paint.
Once the paint dried, I lightly sanded the raised grain, wiped it clean with a rag, and sprayed another coat of paint.

After the wood dried, I laid out my casters on the unpainted side.
Using a tape measure, I measured in an inch on each corner to place each of the four caster wheels.

QUICK TIP #1: You want to be sure you get a sturdy, locking caster with polyurethane wheels. Plastic wheels will break down more quickly.
After marking my holes, I used the drill attached the wheels.

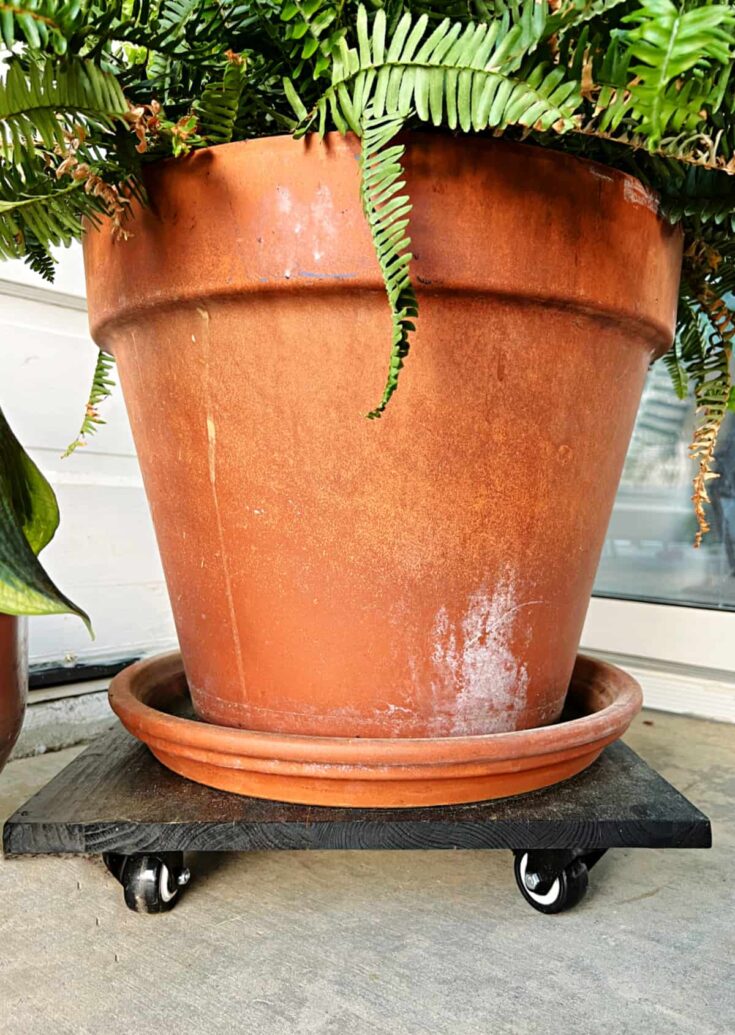
A Completed DIY Plant Caddy
That’s all there is to it!
Put your potted plant on it and find that perfect spot…or move it around until you find that perfect spot. With a rolling plant caddy you can do just that!

Check out more DIY gardening ideas
DIY Rolling Plant Caddy
How to make a DIY rolling plant caddy with a scrap piece of pine wood and four heavy duty locking caster wheels.
Materials
- 3/4" or larger wood
- spray paint
- 4 locking casters
- sand paper
- clean rag
Tools
- Miter Saw
- Drill
- Tape Measure
Instructions
- To determine size of wood for plant caddy, use tape measure or use biggest pot or saucer
- Cut wood with miter saw
- Use sand paper to smooth top and edges of wood
- Wipe dust off of wood with clean rag
- Spray paint top and sides of wood
- Let wood dry
- Lightly sand raised grain on wood
- Wipe dust off with clean rag
- Spray second coat of paint on wood
- Let dry
- Place wood paint side down
- Use tape measure to measure 1" in from sides on each corner for casters
- Mark screw holes
- *Attach each caster wheel to each corner
- Turn plant caddy over and place your potted plant on top
Notes
* check the length of the screws used to attach caster wheels so that they aren't longer than the thickness of the wood