
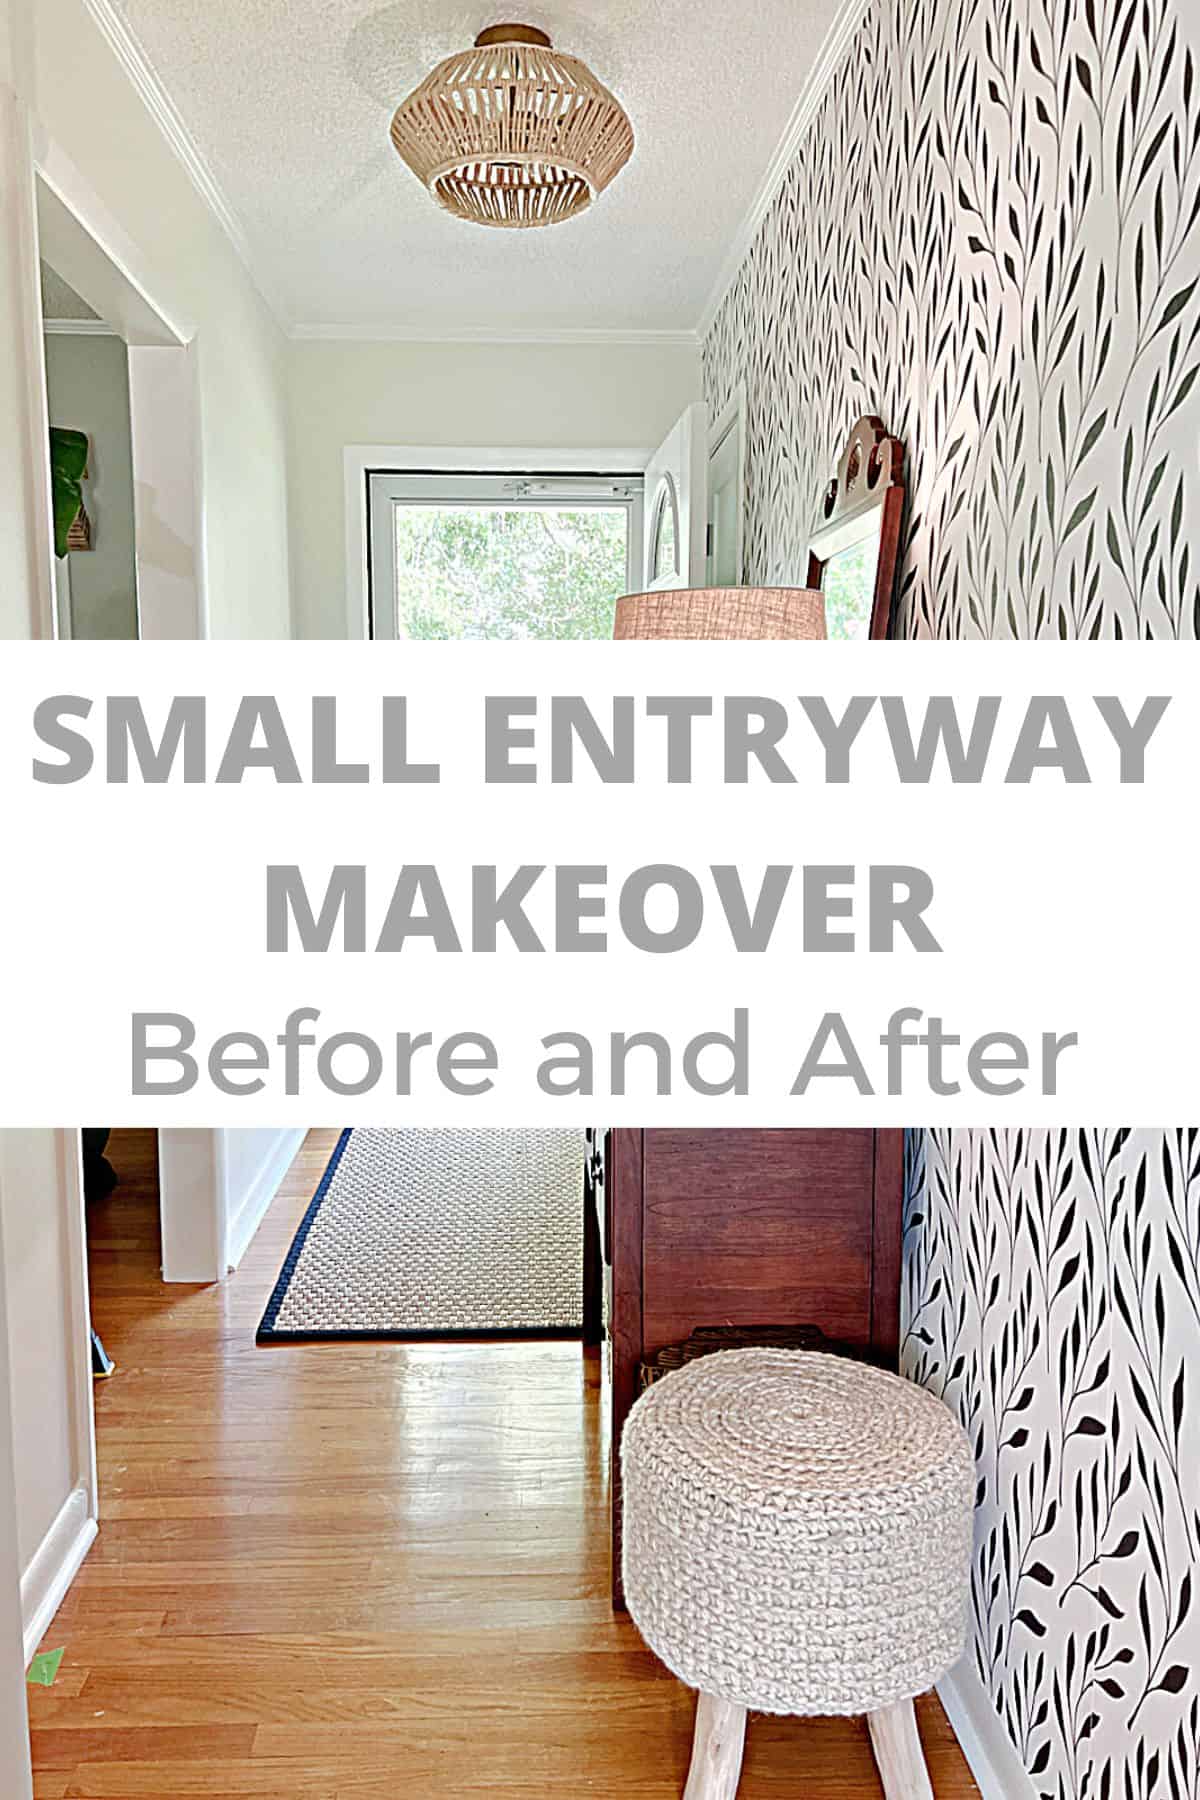
Small Entryway Makeover with Wallpaper
Whether it’s big or small, the entryway of your home is an important space when it comes to decorating.
Not only does it greet you when you come home, but it’s the first space guests see when the come to visit. That’s why it’s so important to decorate it just like you would your kitchen or living room.
If you’re looking to tackle a small entryway makeover of your own, or any other space in your home, read on to learn the tricks and tips we used to create a welcoming new space.

When we moved into our cottage in the country I knew that every room was going to need a makeover at some point. Our small entryway was near the top of the list.
I’ve already tackled the living room, with its black stained panelling, and the navy blue dining room, so I was excited to start on the entryway.
It’s a long, narrow space so I thought it would be an easy space to do.
Small Entryway Before

Um yeah, that was my first mistake. Nothing about this space was easy.
So let’s start at the top and work our way down.
Everything in this space would need a refresh, including fresh paint on the ceiling. In order to do that I had to caulk all the seams and cracks around the popcorn ceiling and trim.
The original plan was to scrape the ceiling or cover it with tongue and groove but neither one is happening, not right now at least.
Scraping is not something we want to do since the house was built in the 60’s and it’s highly likely that it has asbestos in it. Besides that, it’s already been painted so scraping would be tough.
Anyway…after caulking and painting the ceiling, I painted all the trim.
Well…almost.

Oil Based Paint Issues
So, the inside of the house is covered in oil based paint. The doors, bookcases in the living room and all the trim are painted in a cream oil based paint.
That would be a problem in itself but there’s an even bigger issue. Someone painted over the oil based paint with latex, without sanding or priming.
If you’ve ever had this in a house you moved into then you know what a big deal it is.
You should never paint latex over oil based paint, especially if it’s glossy. Latex paint doesn’t adhere properly to the shine of the glossy, oil based paint so you are left with peeling paint.
So, if you have glossy oil based paint on trim you need to sand the shine off so that the paint will stick. The other option is to use a good bonding primer before you paint.
Unfortunately I had to deal with latex over oil based gloss paint. I could have peeled it all off and started over but I chose to go the bonding primer route.
I just painted all the trim with 2 coats of the bonding primer. If there was any loose or flaking paint I lightly sanded those spots before I primed.
After all of that drama, I was able to paint the trim.
I chose to use the same color the previous homeowner used, Behr Polar Bear, which is a crisp white. I like the color but I did have it color matched with my favorite Benjamin Moore Advanced Paint.
Painting the Walls a Creamy White
With the trim and ceiling finally done, I painted the walls.
They were painted in a medium gray color that really darkened our north facing entry so I went with a creamy white, BM Swiss Coffee.
An Accent Entryway Wall with Peel and Stick Wallpaper
Our entryway didn’t have any interesting features, and it’s too narrow for a lot of decor, so I decided to add an accent wall with peel and stick wallpaper.

It took me 4 months to pull the trigger and make a decision but I love how it turned out, and it really modernized the space.
This was our first time using peel and stick wallpaper and I have to say that I’m not sure I’m a fan.
Number 1…it’s expensive. Really expensive.
Number 2…it’s a 2 person job, so I had to wait for Roger to find time to help me.

Number 3…it wasn’t as easy to put up as I had hoped.
All that to say that although it is pretty, I’m not sure I would use it again. What I do know for sure is that I wouldn’t paper a whole room with it.
Entryway Closet Door
With the walls and trim done, it was time to address the plain wood closet door. Luckily this door wasn’t painted with latex over oil based paint, like the rest of the house.
It did need a little something though, to match all of the other changes in the room.
I was going to try to add some trim to give it dimension but decided a new door would be better. I was lucky enough to find some interior doors that were getting discontinued so we scooped them all up (8 total).
It turns out that installing new doors is a job in itself. We had to trim the new door to size, router out the sides for hinges and drill holes for the new updated door knobs.

I painted 3 coats of Polar Bear, that was used on on all trim, on both sides and we hung the new door. It was definitely a big job but so worth it in the end.
New Front Door for a Small Entryway
The last piece to this entryway makeover was my new front door, I chose this one. This was another project that took on a life of its own.
The first door I ordered never delivered (even though the store I ordered it from insisted it was). After I filed a police report (I know, right?) and got my refund, I reordered the door.
Finally, after 2 more months, my new door was delivered and the makeover could continue.
Like the closet door, the new front door needed to be cut down. It’s a heavy wood door with lots of glass so cutting it down was a bit nerve-wracking.
We also had to router the sides for the hinges and cut the holes for the door knob and lock.

Surprisingly this project went smoothly and, in no time, we were able to hang it with new hinges, a new door handle and new deadbolt.
I was going to leave the wood for a while but decided to paint the inside of the door with the same paint as the closet door and all the trim, Behr Polar Bear mixed in BM Advance.

I seem to change up the color of the door often so paint was the logical choice for the new door.
A New Entryway Ceiling Light
The last item on the makeover list was a new light fixture (the one i chose is discontinued but this is similar). I love the way it looks in our new space.
It adds a bit of texture without overwhelming this small space. Plus I love how the light reflects off of the ceiling.

Decorating an Entryway
Since this is a narrow space, I went simple with my decor. I moved the console back into place, hung a mirror, placed a small stool for putting on your shoes and laid a vintage Turkish rug to complete this entry makeover.

It’s a small step with all of the other house renovations we need to do, but I’m enjoying the new look. Fingers crossed that the rest of the room makeovers go more smoothly.
It was a lot to take in but I’m hoping that this small entryway makeover will give you a some ideas you can use in your own home.