
Installing a motion light
I just want to say, before I get into this next project, that this post might not be for everyone. It involves working with electricity and may seem like something that a typical DIY’er might not do, but this blog is about the DIY projects that we have done, so I have documented our process.
Hopefully it will be useful to someone.
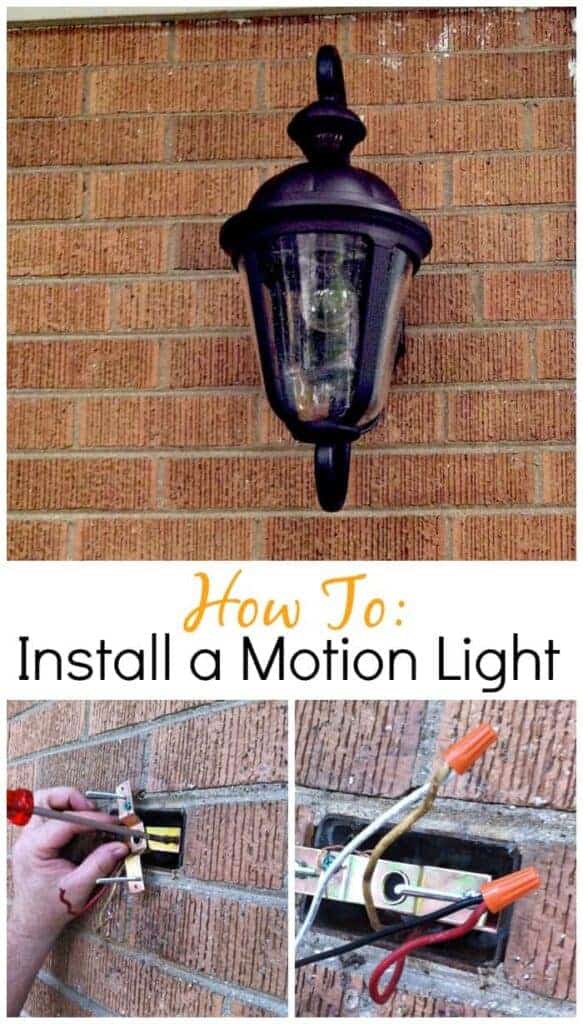
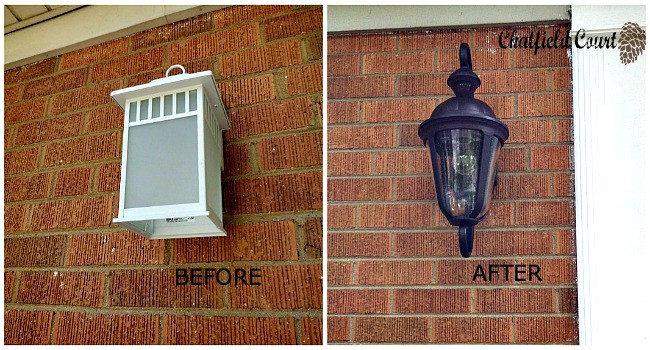
When we moved into our house the front porch had a small light by the front door. This is the entrance we are always using, because we have a detached garage. Keeping the light on at night when we go out draws so many bugs so we decided to put up a motion light. They work how you would expect by turning on when there is motion in the range of the sensor, and will stay on for the amount of time you set it at. There is a programmer right at the base of the light to set when you want it to start coming on, and for amount of time you want the light on. Motion lights are no more expensive than regular lights and they are offered in some very nice styles, and at different price points. There isn’t as much of a variety as standard porch lights, but I had no problem finding something I liked. I bought mine at Lowes and paid $60 for each light. They did have cheaper lights, but since I only needed one light for the front door and one for the back door, I found a style that I really liked.
You should only do this if you are comfortable working with electricity. It’s not a hard project to do but you do need to be careful. If you attempt to put your own light up and come to a point where you feel unsure, please call a licensed electrician.
The very first thing that you need to do is to turn the power off in the breaker box, our house has a circuit breaker box but some houses still have fuse panels. Turning the power off is very, very important!!
Next you want to remove the lamp from the wall by unscrewing the nuts that hold the lamp in place, there are usually 2. Pull the light off the wall and remove the wires from the electrical box on the house, so you can remove the wire nuts (they are orange in this picture).
You need to make note of what color all of the wires are and what they are attached to. Make sure you only remove the wire nuts that are attached to the old light fixture, as there could be other wires and wire nuts in the electrical box.
You don’t want to disconnect any extra wires.
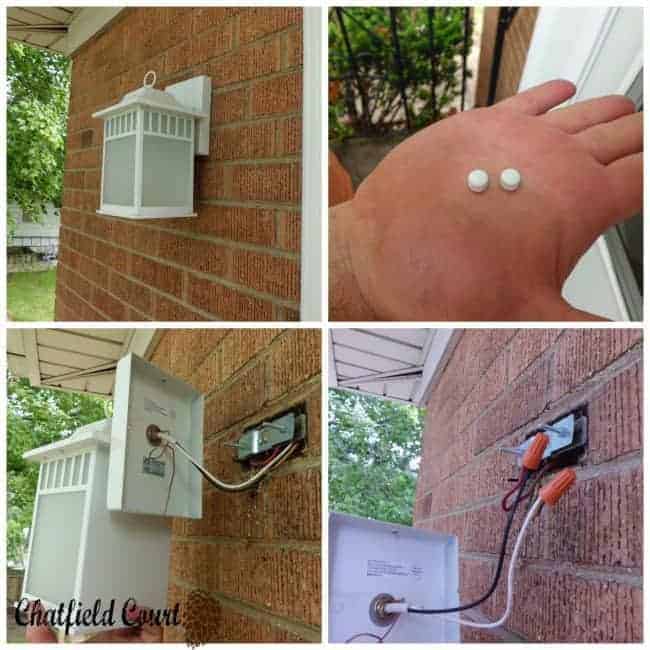
Next, you need to remove the old bracket that the lamp was mounted to and install the bracket that comes with the new lamp fixture. Most of the brackets swivel, so you want to be sure that it is straight so your light hangs straight.
The new lamp may have a bare copper ground wire , if it does, it gets attached to the green ground screw on the mounting bracket.
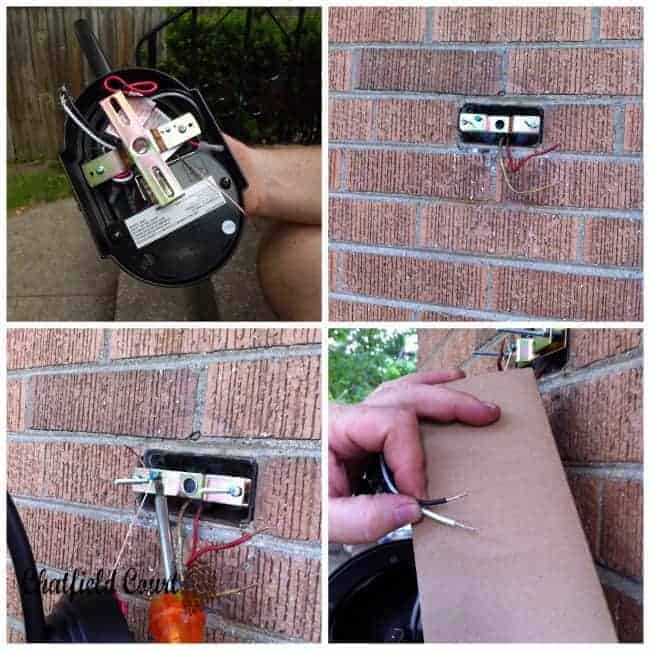
Now it is time to attach the black and white wires from the new lamp to the existing wires on the house using the wire nuts. Make sure that the wires coming out of the electrical box are stripped of the insulation and straight.
You may have to use a pair of pliers to make the copper straight. Normally, white wire goes to white wire and black goes to black but, in our case, black went to red.
This is why you need to take note what color the wires are, (the white wire is the neutral wire and the black/red wire is the hot wire). After the wire nuts are attached, take your wires and insert them into the electrical box behind the bracket so they are out of the way.
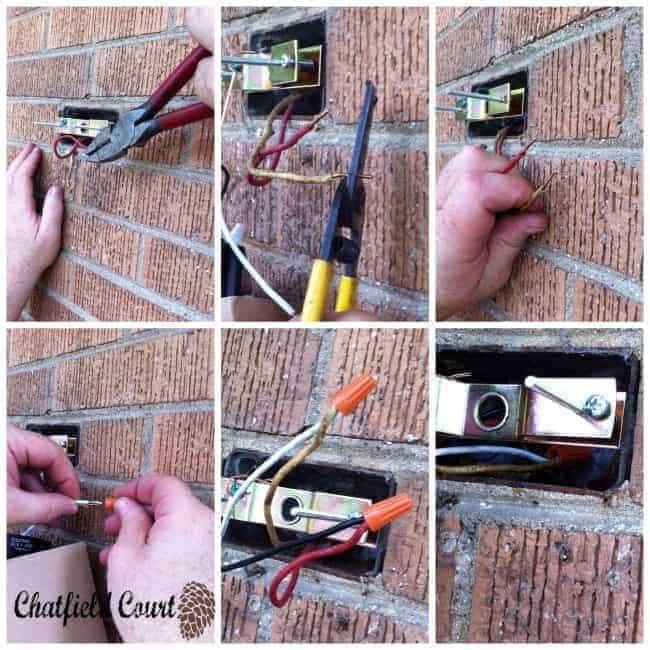
Bottom left, attaching wire nuts to wires. Bottom middle, wire nuts attached to both wires. Bottom right, wires with wire nuts inserted into electrical box.
Next, you can mount the light onto the two screws that are attached to the bracket. Screw the decorative nuts onto the screws that are sticking out of the front of the lamp.
The nuts hold the light onto the house. Put a light bulb in and put the light together.

Turn the circuit breaker back on and test to see if the light is working.
Have you ever installed lighting yourself?