
Repotting a Fiddle Leaf Fig
Tips for repotting a fiddle leaf fig plant including the best time of year to repot, the best kind of potting soil to use and picking out the right pot.
We’ve talked about caring for your fiddle leaf fig, and in order to have a healthy plant, repotting must be part of that care.
I’ve had my Leo for 3 years now. He’s grown from a little 24″ plant to a 6’+ giant. He’s had good light and plenty of water to keep him healthy but he’s been living in the same pot.
It was definitely time for a new home.
Should I repot my fiddle leaf fig?
Not often, but yes. Your FLF should be repotted every 1-3 years, ideally in the spring or summer.
The new pot should be 2-4 inches bigger than the pot that it’s in. Remember they like to be snug so don’t go too big.
For the best results you want to replant in a pot that has drainage holes. FLF’s don’t like wet feet so drainage holes are a must to prevent root rot.

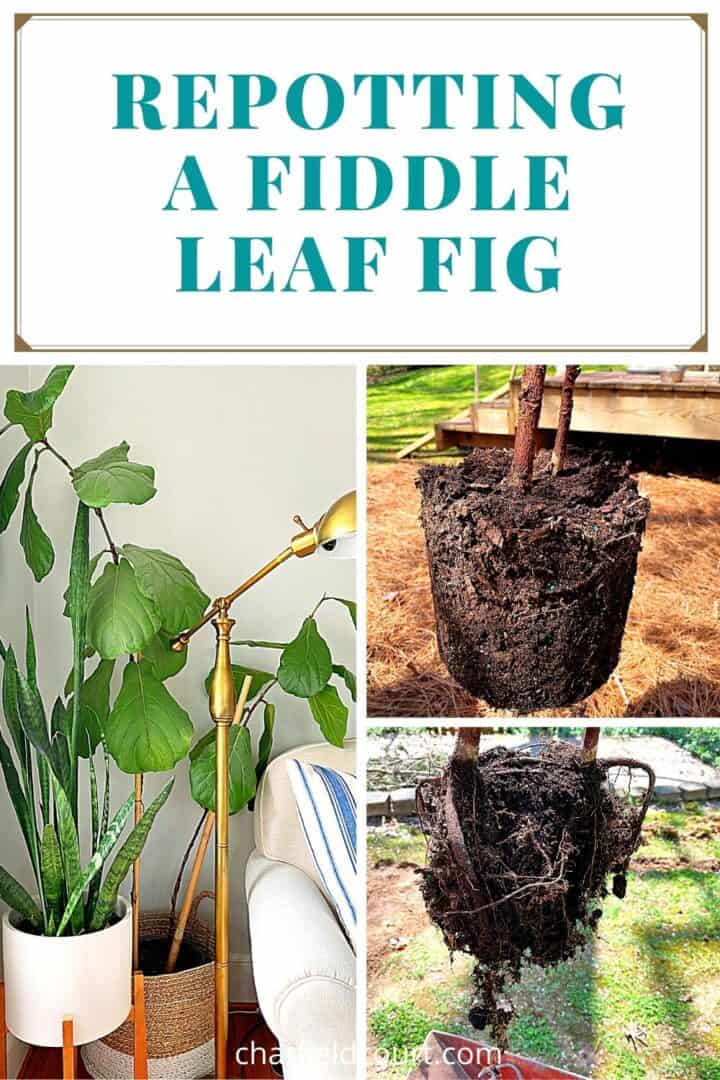
Leo has gone 3 years so it was definitely time for an upgrade to a bigger pot. He’s been living in an 8″ pot and his roots were starting to show.
I picked out a nice 10″ pot for him so he could spread out a little, but not too much. I have my pot sitting in a decorative basket, with a plant saucer at the bottom so I went for something inexpensive.

Repotting your fiddle leaf fig
This can be a messy project so it’s best if you can do it outside. Preferably on a warm, sunny day.
What you need to repot a fiddle leaf fig
- well draining potting soil
- new pot with drainage holes
- clippers for snipping roots
Best soil for a fiddle leaf fig
A fiddle leaf fig likes a good quality potting soil that offers nutrients, is well draining and well aerated.

Since it’s the first time I’m repotting Leo I decided to use a soil made specifically for fiddle leaf figs, but you can use any good quality potting soil. Just make sure it’s well draining.
Before I removed Leo from his old pot I readied the new pot by filling it a 1/3 of the way with the new potting soil.

Once I had my pot and soil ready I carefully removed Leo from his old pot. I hadn’t watered him in several days so it was easy to remove him.

Next, I removed as much of the old soil as I could and checked the roots. If you have really long roots you can snip them off with pruning shears but it’s not necessary.
Leo’s roots looked good so I chose not to cut any off.

After the root ball was cleaned up, I placed Leo in the middle of the soil in the new pot.
Roger held the plant steady while I filled the pot with more soil.
Remember that the soil will settle with time so make sure you tamp it firmly around your FLF.
Once I was done I watered my fiddle leaf fig really well.
I also took the time to hose the dust off the leaves.
I left him to sit in the driveway to dry a bit and then took him back in the house.
If you replant your FLF outside remember to not leave your plant sitting in direct sunlight for long as the leaves could get sunburned.
Leo is back in his favorite summer spot by the window and seems happy.
So far there are no signs of distress from the repotting process, which is great!

I did wait a month for him to settle in to his new pot before I used any fertilizer. FLF’s don’t like change so I didn’t want to do too much too soon.
I’ll keep you updated.
I also propagated my fiddle leaf fig and learned a few things.
Check out the results.
