
DIY Craft Storage Cabinet
How to easily create a DIY craft storage cabinet from an antique armoire to store tools, craft and sewing supplies.
We live in a small stone cottage that was built in 1946. It has loads of charm but not much in the way of storage.
In order for us to keep clutter at bay we’ve had to get creative.
The solution I usually turn to is using cabinets. Dressers, chests, armoires…they are perfect for hiding away our necessities and clutter.
I’ve been busy turning one of our guest bedrooms into my work studio so I needed a storage space for my tools, paint and crafting supplies.

I have a beloved antique armoire in the room but it was only set up to store clothing and linens.
This beauty came from an antique shop in a tiny town in Georgia. I looked at it for weeks before I finally pulled the trigger and I’m so glad that I did.
It’s definitely served its purpose and because of that it’s moved with us to 4 different houses.

I’ve always kept my craft supplies and tools scattered around downstairs in the basement, which was pretty inconvenient since most of my projects take place upstairs.
So creating a dedicated space just for my stuff feels like a luxury.
I was a bit nervous altering my favorite antique but all of the modifications took place on the inside so it really wasn’t a big deal.

This was a super simple project that just took 30 minutes to do.
In the end I had storage shelves, rods for ribbon storage and a few fabric covered bins to contain my supplies.
Supplies
- wood glue
- wood screws
- 3/4″ panel board
- 1x2x8′ pine board
- sand paper
- tension rods
Tools Needed
- table saw
- drill
- miter saw
- tape measure
Creating more storage space
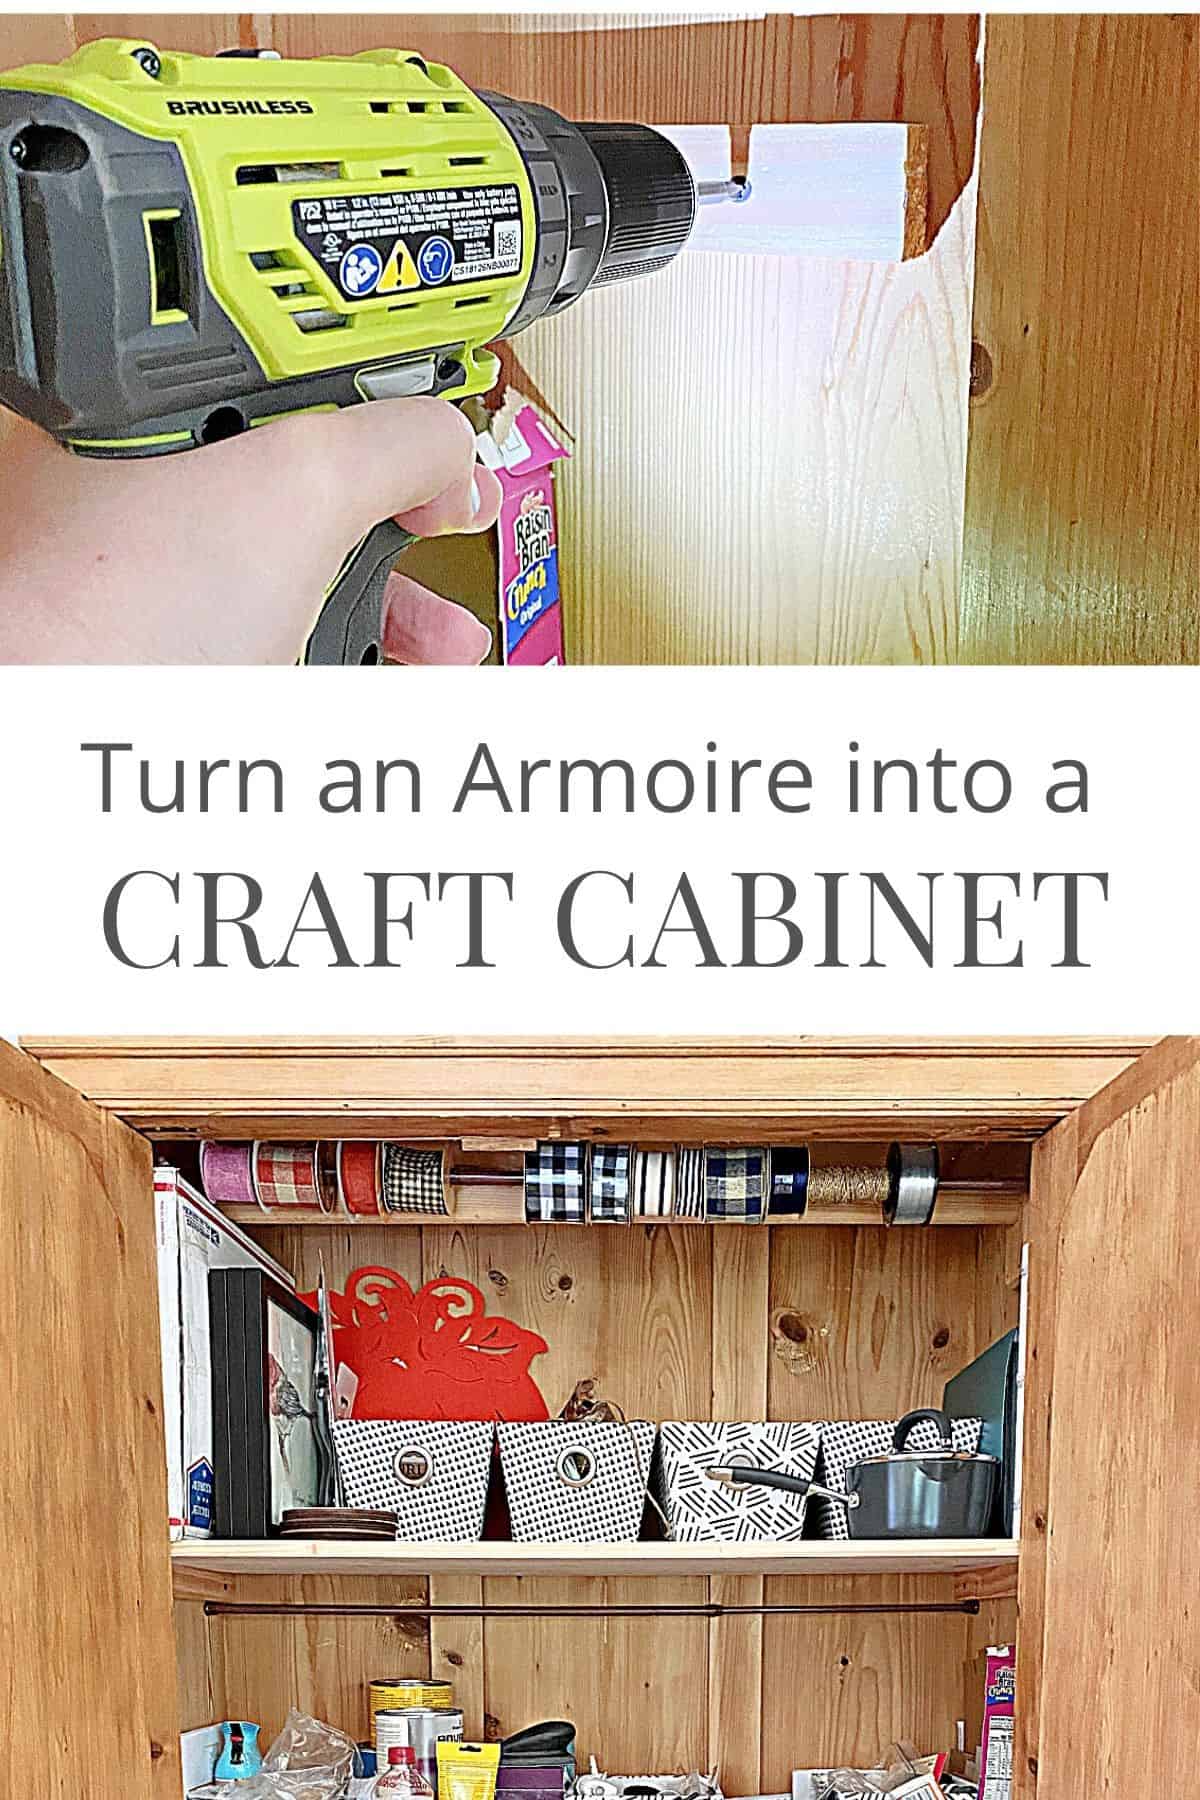
The first thing I did was measure the inside of the armoire to determine where my shelves would go. I needed space for my taller tools and paint cans so I went with 3 shelves.
Next I measured the depth of the armoire so I could determine the length of the 1×2’s, that I used for the shelf supports.
I marked and cut my 1×2 into 6 pieces for the supports.
Once the supports were cut, I checked to make sure they would fit, then drilled a pilot hole in each end for the wood screws.

Note: When choosing the length of your wood screws make sure you don’t go too long (or they will pop out the sides of your cabinet).

Then I spread some wood glue on the back of each support and screwed them in place in the cabinet.

After the supports were installed, I used the table saw to cut down the 3/4″ boards.

I lightly sanded the edges with some fine sand paper, brushed them off and put them on the supports in the cabinet.

After I installed all 3 shelves I started organizing and loading my supplies and tools into the cabinet.

I found a few cute storage boxes online, which are perfect for containing the smaller items.
All of my ribbon found a home on a tension rod. Now they are out of the way but I’m still able to see and access them if I need to.

I couldn’t fit everything that I have but I was able to fit a lot of the things I use most often.
I love the way it turned out. It’s not the most glamorous reveal but seeing all of my stuff all contained together is a thing of beauty to me.
The best thing is that I don’t have to run to the basement every time I need something.
Oh…and the fact that I can just close the doors when I’m done for the day.

Now I just need to finish up the studio redo so I can share the whole space.
More furniture makeovers
- DIY Dresser Makeover in Navy – how I took a beat up Goodwill dresser and turned it into a stunner.