
DIY Seashell Christmas Ornaments
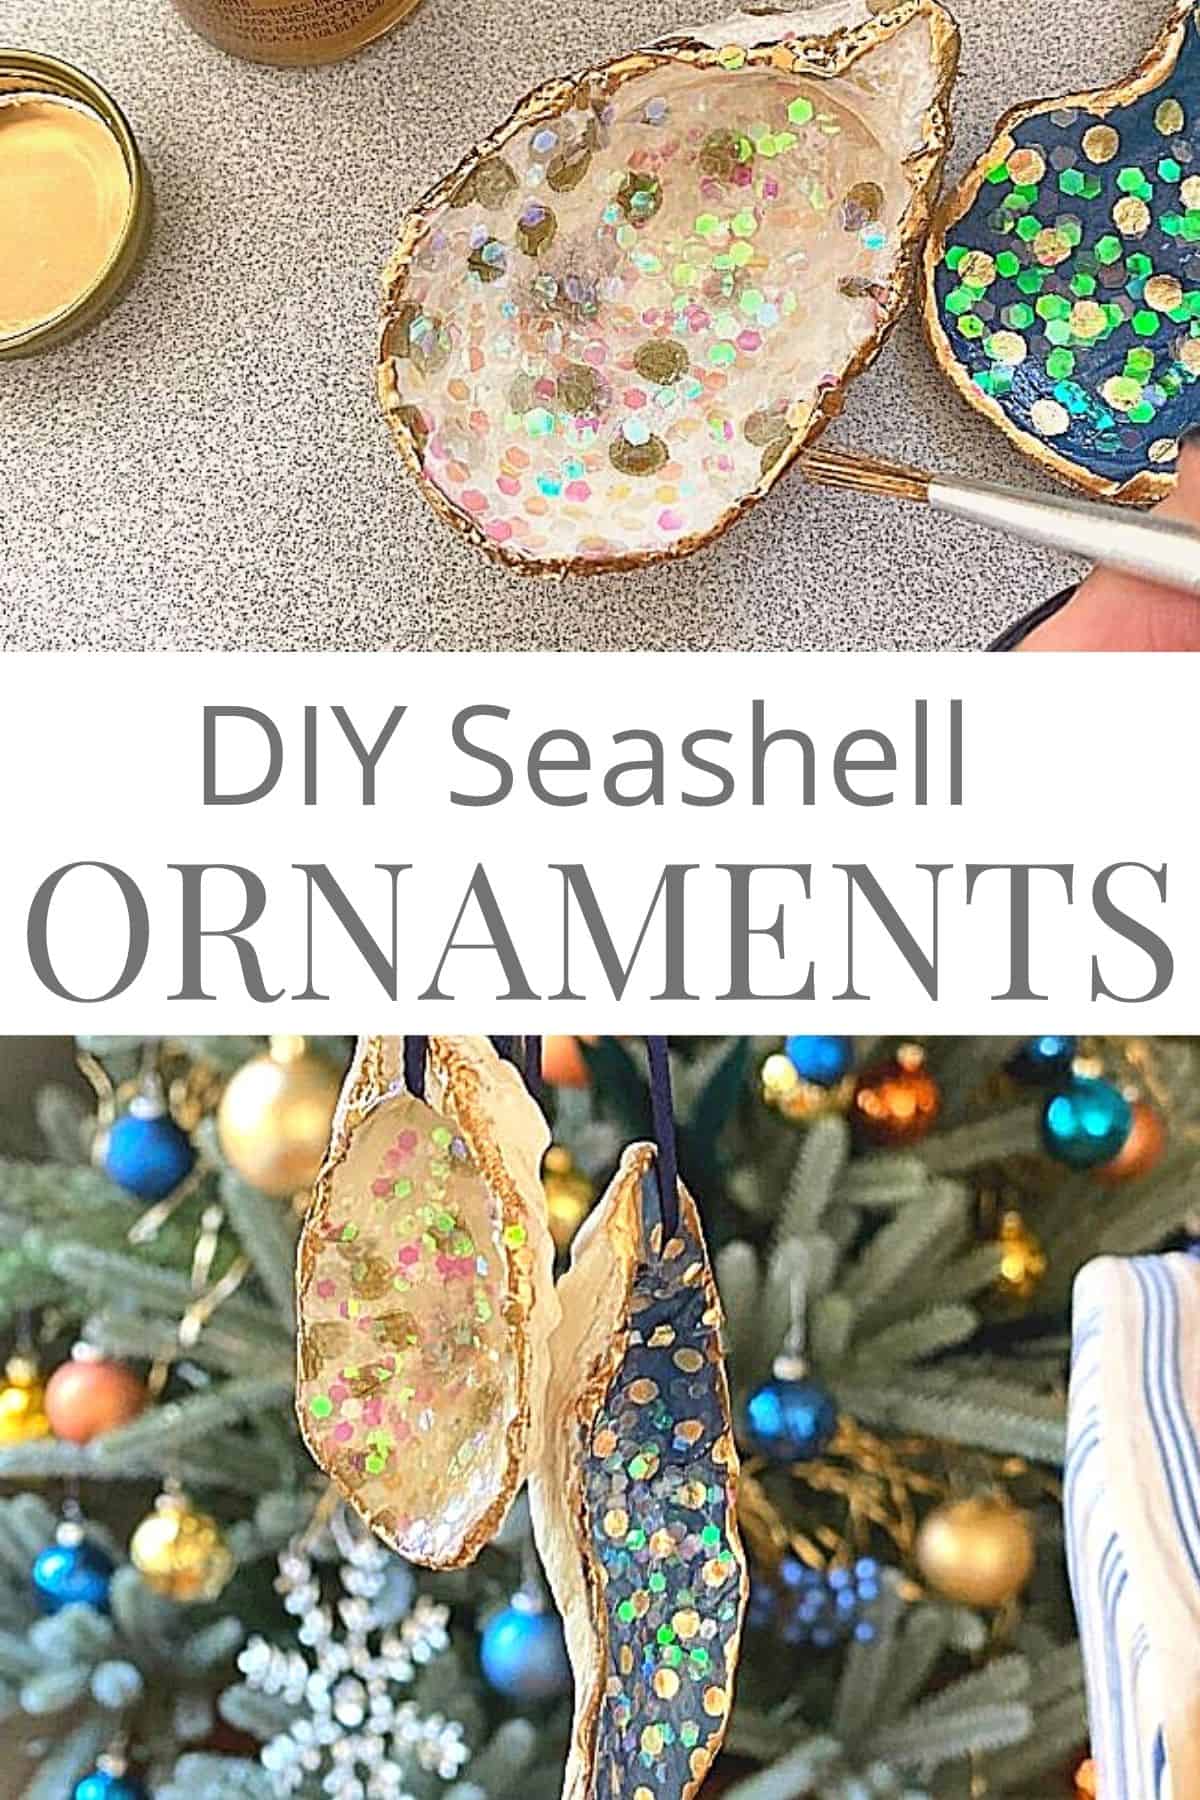
DIY seashell Christmas ornaments made with found oyster shells and tissue paper. A fun and easy way to decorate your Christmas tree.
Being the DIYer that I am, I like to make some of my own Christmas decor every year.
I don’t make all of it but I usually make an ornament or two, a window garland for the kitchen and a front door wreath.
This year I made some easy and fun seashell ornaments from shells that I found on our camping trip to the beach.
It doesn’t happen for every project that I do but as soon as I picked up the shells I knew what I was going to do with them.

Luckily this project worked out like I’d hoped.
Supplies
- seashells
- Dremel or drill
- tissue paper or 2-ply napkins
- Mod Podge
- sand paper
- paint brushes
- opalescent glitter
- liquid leaf
- thin ribbon
How do you make Christmas ornaments with seashells?
There’s so many ways to incorporate seashells into your Christmas decor. One easy way is by making Christmas ornament with them. You can paint them, decoupage them or just use them in their natural state.
It’s a great way to add a touch of nature to your holiday decor.
Making oyster shell ornaments

The first thing I did was to clean my found seashells really well with some hot water and soap. After they are dry, you can start making your Christmas tree ornaments.
My seashells didn’t have a natural hole in them for hanging so I used my Dremel with a drill bit to quickly drill a hole in the top to add my ribbon.
To do it I placed my shell on a wet sponge and added just a bit of water in the shell. You need some water so that the Dremel doesn’t get too hot and break the shell.

In about 3 seconds I had a hole.
When I finished drilling all the holes, I dried the shells and started decoupaging them.
I had beverage napkins and tissue paper that I wanted to try to decoupage. My first attempt was with the beverage napkins.

I needed to work with a thin layer so I just pulled apart the 2-ply napkin. The point is to have as thin a layer as possible to decoupage on to the seashell.

Once I had my napkin separated I added a generous amount of Mod Podge with a paint brush to the underside of the seashell.

Next, I laid the napkin on the Mod Podge that I brushed on the seashell.
I carefully used my finger to press the napkin on the shell, trying not to rip the napkin.
There was extra napkin hanging off the edges of the shell but I left it. I will remove it after the Mod Podge dries.

Once the napkin is spread on the seashell and smooth, I left it to dry.
Don’t worry about getting all of the wrinkles out. The glitter helps to disguise them.
After it was dry I spread another layer of Mod Podge on top of the napkin. Again, I left it to dry.

Once the Mod Podge was completely dry, I used sandpaper to remove the excess napkin around the seashell.
I just sanded in one direction to carefully remove it.

After it was removed I painted another layer of Mod Podge on the napkin and sprinkled opalescent glitter on the Mod Podge.
Again, I left it to dry thoroughly.
Next, I painted thin layer of the liquid gold leaf with a small artist brush, around the edge of the shell.

After that dried, I poked a toothpick through the hole that I drilled in the shell and threaded a piece of thin ribbon through it.

Decoupaging a seashell with tissue paper
After I got the hang of working with the napkins, I moved on working with the tissue paper.
I followed the same process with the tissue paper that I used with the the napkin.
The only difference was with how I placed the tissue paper on the shell.
Tissue paper is noticeably thicker than a napkin so to make it easier to work with, I spritzed a small amount of water on it.

I just continued with the same process of painting a layer of Mod Podge on the shell. After that, I laid the tissue paper on the shell and smoothed it out with my finger.
Once that dried, I followed the steps that I used with the napkin.

It may seem like there are a lot of steps to this project but it was really easy to do.
The hardest part was waiting for the Mod Pod to dry so that I could continue.

I really love how the ornaments turned out though. So much nicer than I imagined they would be when I was walking on that beach.
My favorite happens to be the napkin shells, the white with gold dots.
Roger really liked the navy ones with the gold dots.

Have you ever made Christmas ornaments with seashells?
Check out more DIY Christmas ornament ideas…
- DIY Dried Orange Slice Ornaments
- Easy Mercury Glass Christmas Ornaments
- DIY Succulent Christmas Ornaments