
DIY Fall Wood Sign
How to make a wooden pumpkin sign from an old barn door and a Dollar Tree felt pumpkin to hang on your front porch or display in your home.
Here it is September already, which means I’m all about fall crafting.
I’ve already finished an easy pumpkin craft using putka pods so I’m ready to move on to a project I wanted to make a couple of years ago…a wood pumpkin sign.
It took me a while to figure out how I was going to do it but it finally came together, and it turned out better than I had hoped.
I was even able to recycle an old door destined for the giveaway pile.
Sooo, let’s get to work making a rustic pumpkin sign.

Sign Supplies
- wood or old wood door
- felt pumpkin (I got mine from Dollar Tree)
- wood screws
- scrap wood
- orange spray paint
- black chalk spray paint
- sandpaper
- stencil
- white craft paint
- foam brush
- painter’s tape
- wire to hang sign
Tools
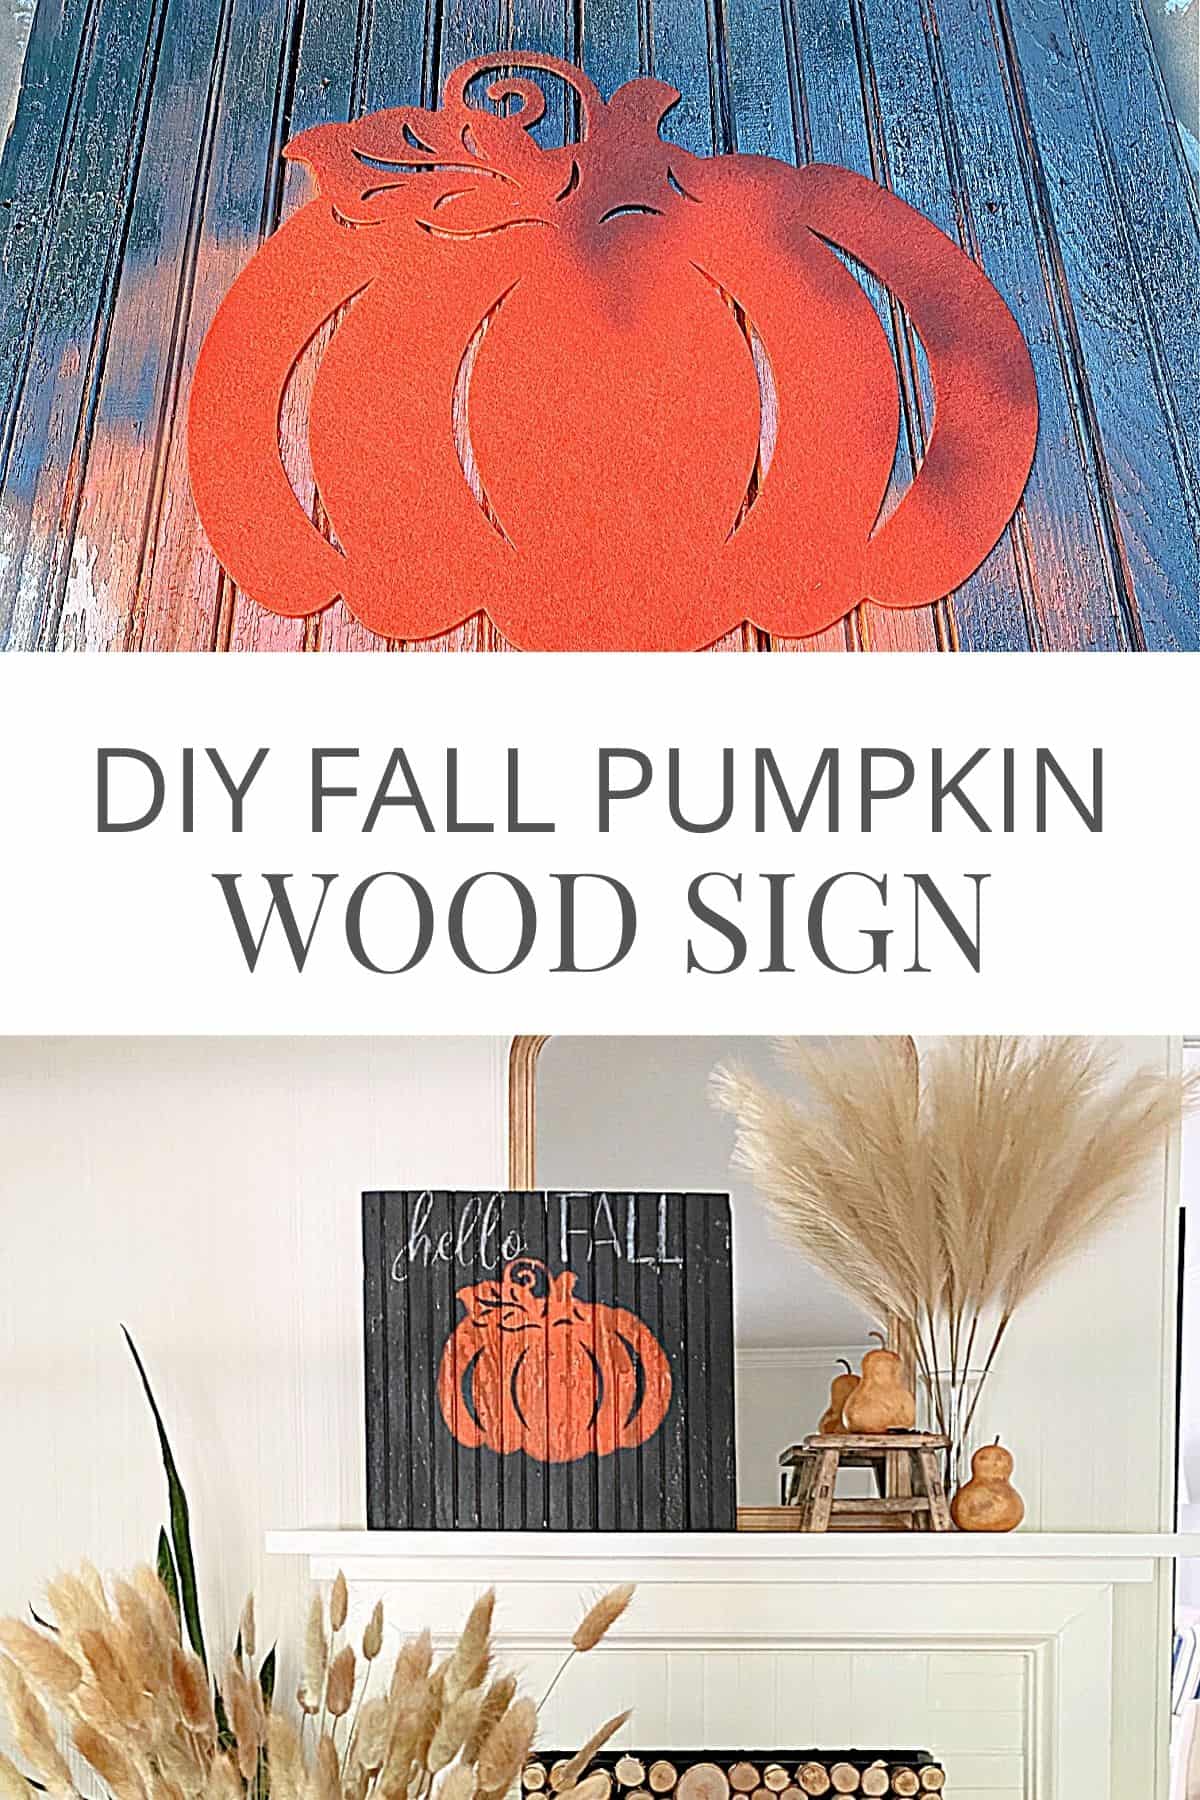
I found a big felt pumpkin at Dollar Tree a couple of years ago and hung on to it just in case I wanted to do something with it.
Really though, how can you go wrong with a giant felt pumpkin that only costs a buck?

Anyway, I knew what I wanted to do with it but didn’t have any ideas for how I was going to use it so I tucked it away in my craft cabinet.
When I was cleaning out the shed this summer though, I found the old barn door that I bought at a flea market when we lived in Illinois.

I used it for a project years ago but it’s been sitting in the shed ever since. Roger has asked to get rid of it several times but I just couldn’t do it.
All of that chippy paint goodness and old wood. You just can’t recreate it.
I was finally ready to haul it up to the curb so someone could take it and use it when I had a bright idea.
The Dollar Tree pumpkin and that old wood door would make a perfect pumpkin sign for our fall front porch.
Making a Sign
I hauled the door out of the shed, removed the hinges and random screws and got ready to cut it down.
Part of the old door would be the base of the sign with the pumpkin front and center so I had to cut it down.
As usual I kept this super simple so I didn’t do any measuring.
I just placed the felt pumpkin on the door where I wanted it and used the circular saw to cut down the door.

There were a couple of braces on the back to keep the tongue and groove together but they were in bad shape so I had to supplement them.
I took two pieces of wood from my scrap pile (they need to be the same thickness) and wood screws and screwed each board to it.
Quick note: make sure the wood screws are not longer than the thickness of the wood door and support.

Now that my sign was built it was time to paint it.
Painting a Pumpkin
I wanted my pumpkin to be orange, naturally, so I used the orange spray paint first.
I concentrated mostly in the center, where the pumpkin would go, and didn’t worry about getting the edges.

You’ll notice that I didn’t sand any of the chippy white paint before I started painting.
We’ll talk more about that in a bit.
Anyway…after the orange paint dried, I placed the felt pumpkin in the middle and painted the whole sign with the black chalk paint, doing two coats.

After the black paint dried I removed the pumpkin.

Like I said, I loved the chippy paint so I deliberately left it when I started this project.
This is a rustic pumpkin sign after all, so I just took a medium grit sandpaper and lightly sanded some spots all over the sign to expose the chippy paint.
The sanding brought out some of the white, orange and the original wood.
Perfect rustic fall charm!

My pumpkin sign was done and it had just the right amount of rustic-ness to it.
The more I looked at it though, the more I thought that it was missing something.
Nothing that I little stenciling couldn’t fix.
Really, you could stop here and hang it up or prop it against a wall but I went a step further.

Stenciling a Wood Sign
To finish up my sign I grabbed some white craft paint, a foam brush, painter’s tape and my “Hello Fall” stencil.
The idea was to stencil “Hello Fall” on the top of the sign.
The only problem was that my stencil was vertical and I needed something that was horizontal.
Not a big deal. I just stenciled one word at a time.

Again, I didn’t do any measuring I just eyeballed where each word should go and tried to make sure the stencil was straight.
When I was happy with the placement I used a couple of pieces of painter’s tape to keep the stencil in place.

Then I put a small amount of white craft paint in a bowl with a bit of water and mixed it well.
I dipped the foam brush in the diluted craft paint and dabbed most of the paint off with a dry paper towel. Then I lightly tamped my foam brush on the stencil.
When I was done with my first word I took a clean paper towel and carefully dabbed my paint (so much dabbing going on).
Then I immediately, and carefully, pulled up the stencil.
I followed the same steps to stencil “Fall”.

After the stenciling was done and dry, I took my sign outside to do a bit of light sanding.
I wanted the stencil to have to same rustic appearance as the rest of the sign so I just passed the sanding block over the letters a couple of times.

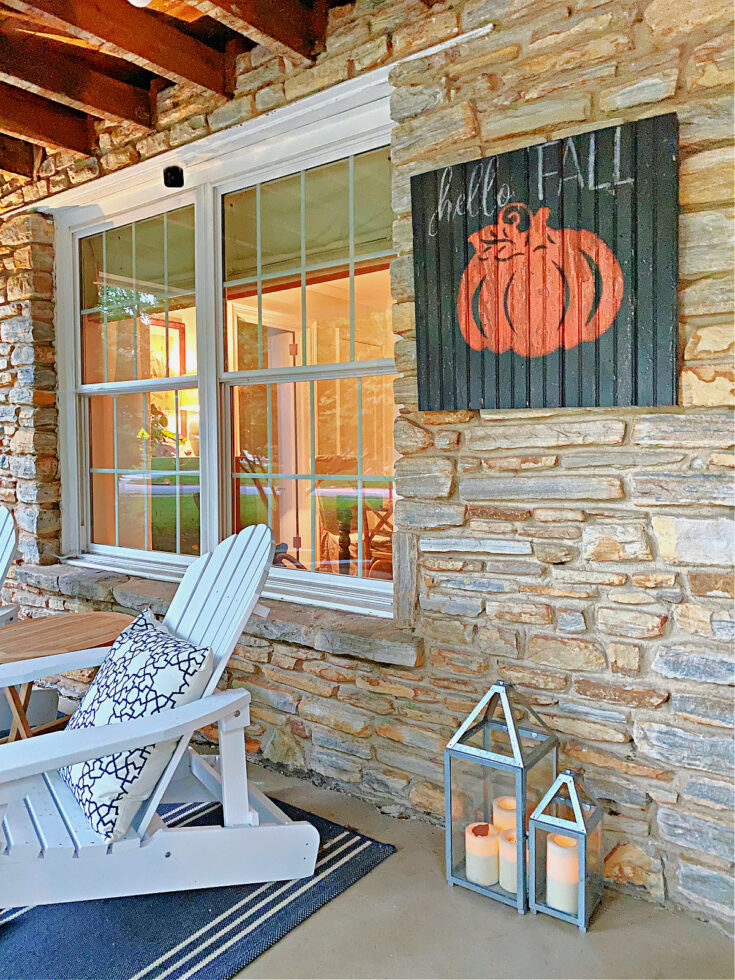
After the sign was sanded and cleaned up I added 2 wood screws on the back with a bit of wire so I could hang it up.

I’ve been moving my fall pumpkin sign all over the cottage.
First it was leaning on our fall mantle and then I hung it on the front porch next to my Indian corn wreath for a few days.

I’m not sure where I like it best but I do love it, and I’m so happy that I was able to recycle that old barn door.

More fall DIY decor projects to try
DIY Fall Sign
How to make a rustic fall sign from an old wood door for your front porch, or indoor fall decor. An easy and fun to make fall DIY project
Materials
- wood or old wood door
- felt pumpkin (I got mine from the Dollar Tree)
- wood screws
- scrap wood
- orange spray paint
- black chalk spray paint
- sandpaper
- stencil
- white craft paint
- foam brush
- painter's tape
- wire to hang sign
Tools
- circular saw
- drill
- screwdriver
Instructions
- Remove screws and nails from old wood
- Place felt pumpkin on wood to determine where wood should be cut
- Use circular saw to cut wood
- Reinforce back supports with screws so wood planks stay together
- Use orange spray paint to paint sign, concentrating on the area where the pumpkin will go
- Let paint dry
- Place felt pumpkin in middle of sign and spray whole sign with black spray paint
- Remove felt pumpkin
- Let paint dry
- Lightly sand sign to distress it
- You can stop here or add a stencil
- To add stencil, find placement
- Use painter's tape to secure stencil
- In bowl mix a little white craft paint with water
- Use foam brush to lightly tamp on diluted white craft paint (using a dry paper towel to remove excess paint)
- Remove stencil after painting
- Let paint dry
- Lightly sand stencil to distress
- To hang: add 2 wood screws to wood support on back of sign
- Secure wire to each screw
- Hang and enjoy!
- Happy Fall!
