
Easy Fall Craft Using Putka Pods
How to make this easy fall craft using putka pods, styrofoam craft cones and orange ribbon.
There’s nothing I love more than crafting in the fall.
Right now I have two fall crafts going on at once, a DIY fall pumpkin sign and pumpkin trees with putka pods.
I came across these cute little putka pods last year and knew that I wanted to try to make something fun with them for fall.
I didn’t have time to create anything last year so they sat in storage waiting for me.

What are putka pods?
They look like adorable mini pumpkins but they’re actually fruit from the Glochidion Ferdinandi tree.
The trees grow naturally across eastern Australia and the fruit, or putka pods, are food for many birds species.
Putka pods are generally used in potpourri, satchels and many fall crafts.
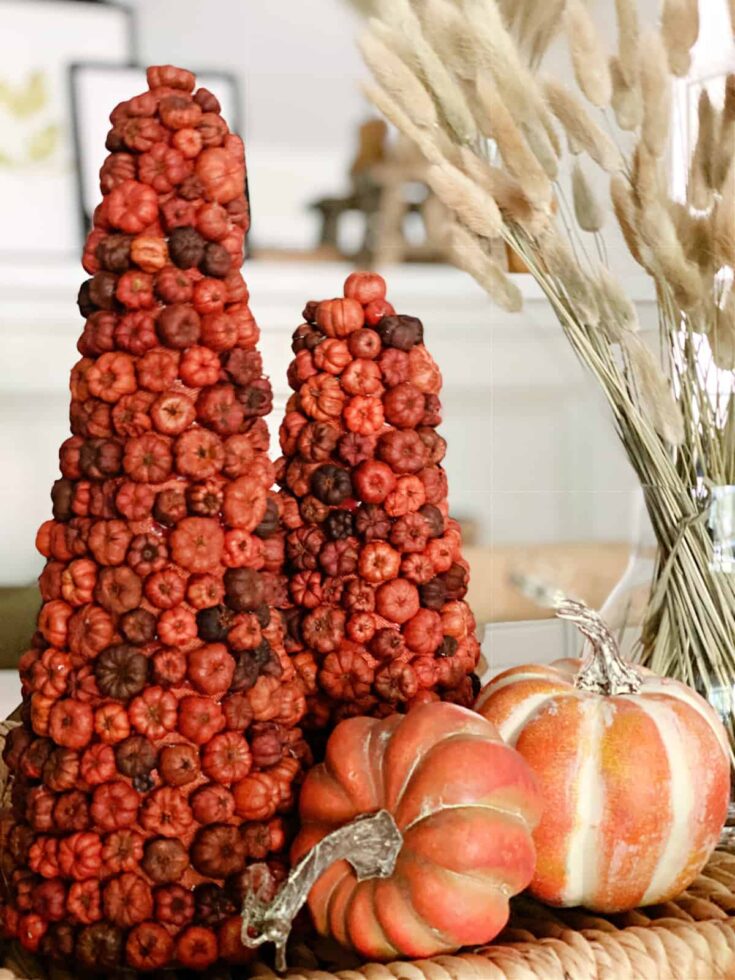
This time they will be used to make a couple of fabulous fall pumpkin trees.

I know, I know…
Whoever heard of a pumpkin tree?
Well, they grow on trees so my idea isn’t really that far-fetched.
Right?
Anyway, my first thought was to make a wreath, similar to what I’ve seen online, but I always make wreaths.
I wanted to create something different so I settled on putka pods pumpkin trees.
Definitely a mouthful to say but they’re so easy to make with just a few craft supplies.
Pumpkin Craft Supplies
Making Pumpkin Trees
I gathered my supplies and started to create my fall trees.
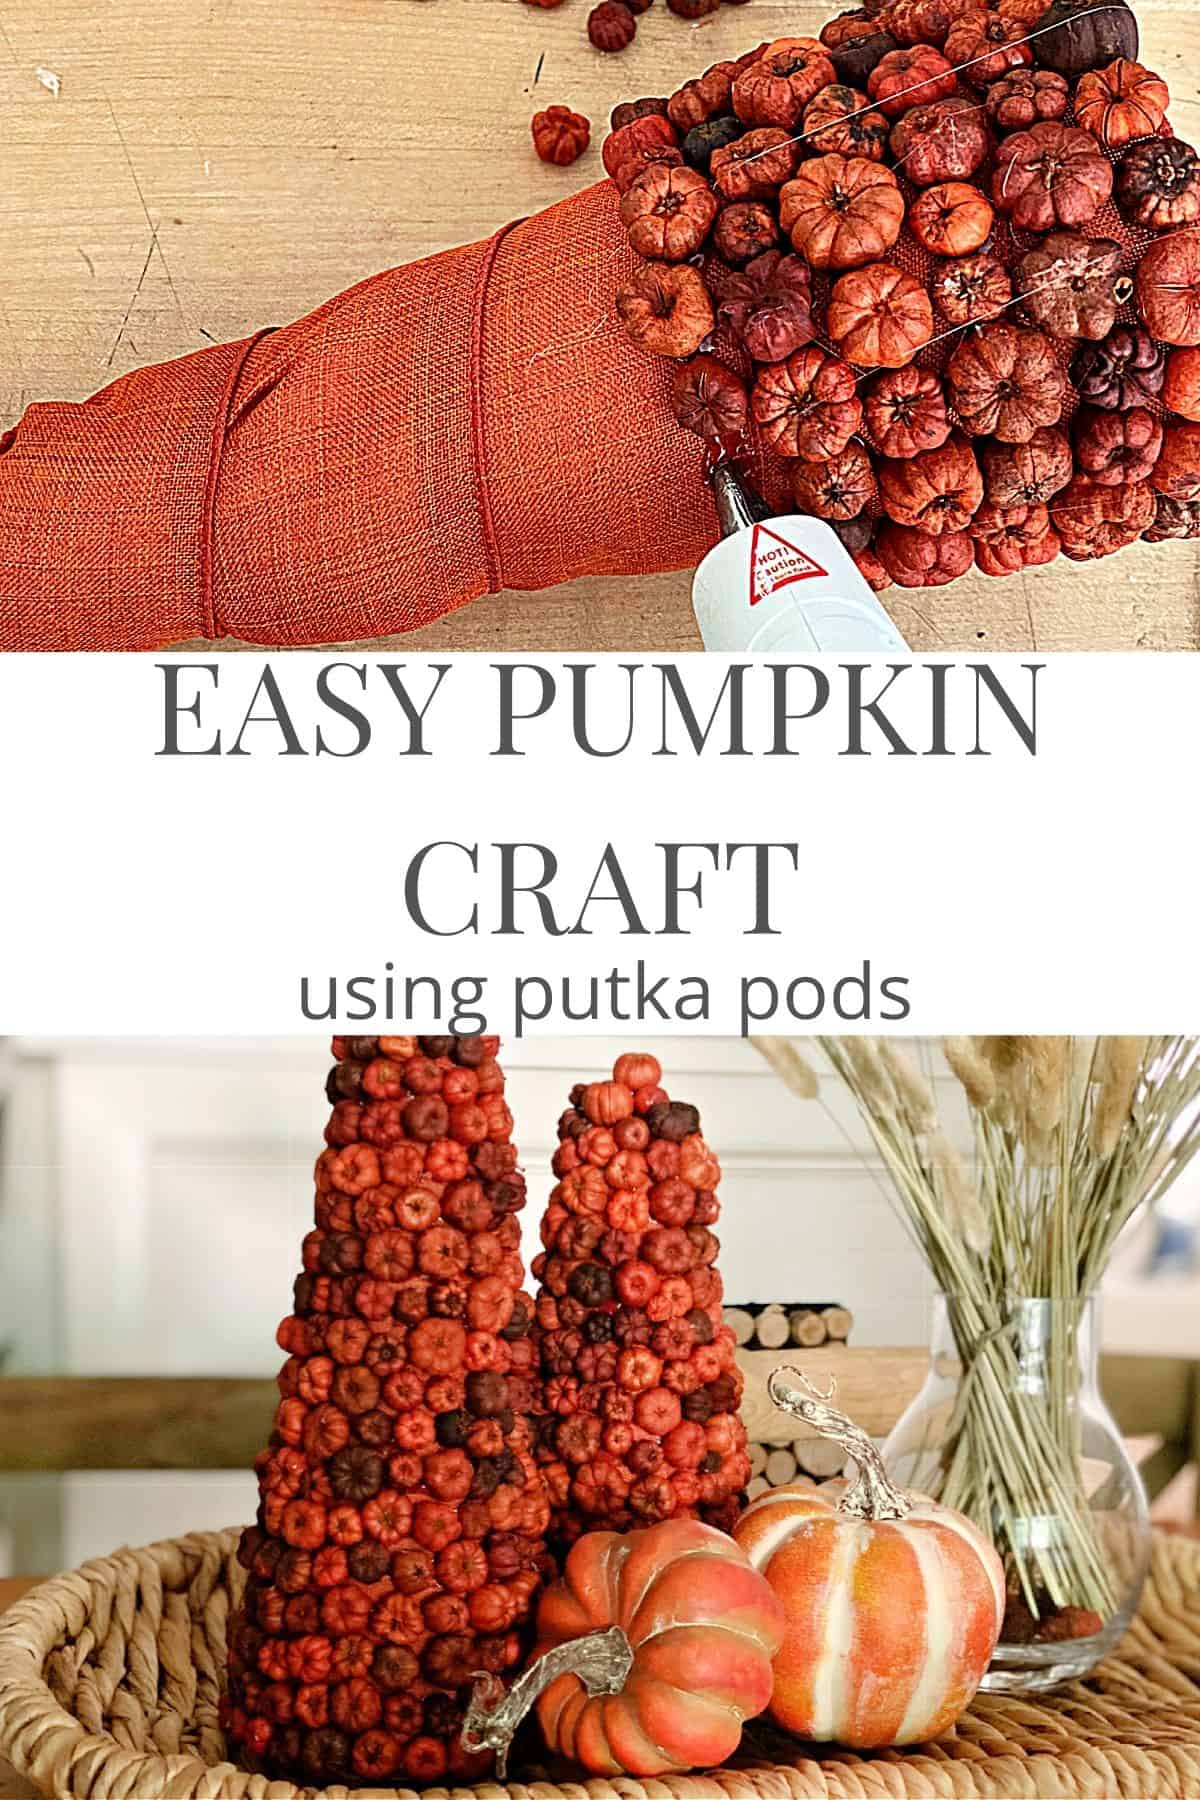
The first step was to wrap the styrofoam craft cones with the burlap ribbon so that all of the white styrofoam was covered.
I used a few straight pins here and there to keep the ribbon in place.

I wrapped the craft cone all the way to the top, using more pins.

If you’ve ever tried to wrap ribbon around a craft cone then you’ll know that it’s not easy to wrap it neatly.
For this project the ribbon on the cones will get covered so don’t worry if you have a few wrinkles along the way.
Remember, this is supposed to be easy.

After the styrofoam craft cone was wrapped I plugged in my hot glue gun to glue the putka pods to it.
I started at the bottom so that I could be sure that the cone would stand flat.
To glue the pods I just put a small bead of glue on the cone and attached 4 or 5 at a time.
I didn’t worry if they were upside down, on some of them it was hard to tell, but I did put the ones that had a little stem on them right side out.

The putka pods were very easy to glue on the ribbon so it didn’t take long to complete.

Once I finished I added a few tiny pods to some of the bigger holes and then cleaned up the hot glue strings.

It took me about 30 minutes to glue all of the pods on my small pumpkin tree and about 45 minutes to do the big tree.
Now I have totally unique and fun fall decoration that I can pull out for years to come.

Storing your putka pod pumpkin tree
If you want to keep your putka pod fall craft to display another year you need to store them away in a labeled, airtight container.
Make sure that it’s something that mice can’t get into…because they love putka pods.
Place your container in a dry and cool place, where you’ll be able to find them come next fall.
I can’t tell you how many times I put stuff away only to forget about it the following year.
So with my pumpkin trees done, the fall season has begun at the cottage. Now we just have to get the weather to cooperate and cool down another 25 degrees or so.
More fall pumpkin crafts to try
Easy Fall Craft Using Putka Pods
How to make this fun and funky fall craft pumpkin tree with dried putka pods and styrofoam craft cones. So easy to make.
Materials
- dried putka pods
- styrofoam craft cones
- orange burlap ribbon
- straight pins
Tools
- hot glue gun
Instructions
- Gather supplies
- Plug in hot glue gun
- Wrap ribbon around cone, using straight pins to keep ribbon in place
- Start at the bottom of the craft cone and glue pods on ribbon
- Spread a bead of glue and put 4 or 5 pods on at a time
- Work your way up the craft cone
- Once it's covered, check for any larger holes and fill with glue and small putka pod
- Clean up hot glue strings
- Repeat process for 2nd craft cone
Notes
Store remaining putka pods and pumpkin trees in airtight container in cool, dry place!
