
Quick and Easy Fall Chalkboard Sign
How to make an inexpensive, quick and easy fall chalkboard sign with a pre-made sign, stick-on graphics and wood autumn leaf cutouts.
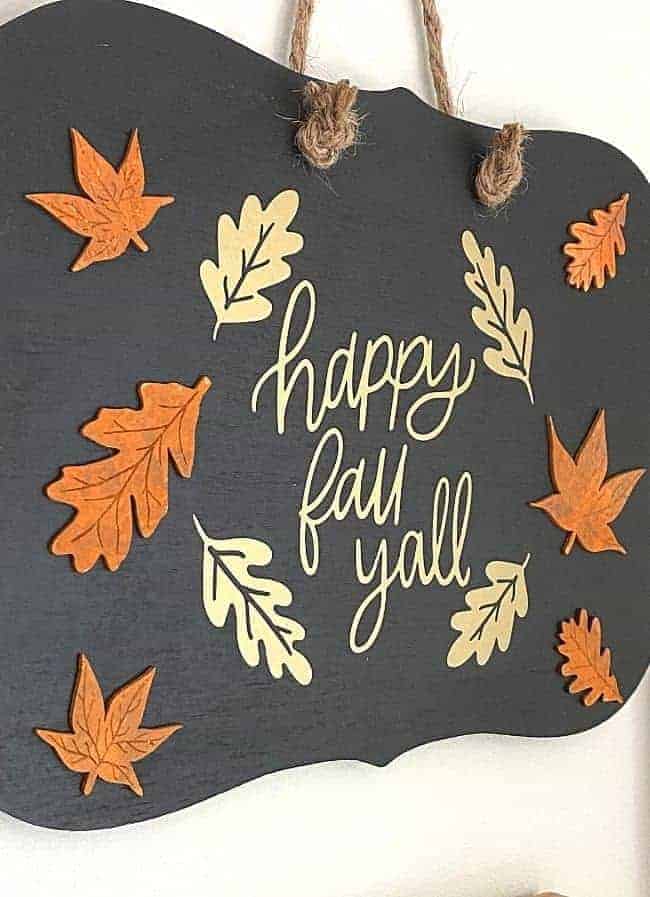
Happy fall y’all
I love quick and easy crafts and this one is the fastest one I’ve made yet, plus you don’t need any tools (some painting is optional).
DIY fall decor doesn’t have to be complicated.

This wooden chalkboard sign that I made was put together in minutes with stickers and a ready-made chalkboard sign that I found in the Dollar Spot in Target.
So, not only is this a super easy to do fall project but also it’s budget-friendly. Make sure you check out my video tutorial as well.
Supplies to make a farmhouse fall sign
- chalkboard sign
- transfer tape
- scissors
- stick-on graphics
- plastic squeegee
- wood stick-on leaves
- orange craft paint
- small paint brush
Create a fall sign in minutes
After gathering my supplies I started by making sure the pre-made chalkboard sign was clean and free of dust (so the stickers would stick).

Next, I cut a piece of transfer tape the size of the vinyl sticker, peeled the backing off and placed it sticky-side down on the sticker.

I used the plastic squeegee and gently rubbed the transfer tape. The idea is to transfer the vinyl over to the transfer tape.
I slowly peeled the transfer tape and placed the sticker in middle of chalkboard sign, making sure that it was lined up straight. I used the plastic squeegee again to transfer the sticker on to the sign.

When I was sure the sticker was transferred I gently peeled back the transfer tape.

Voila! A quick and easy fall sign ready to hang.

You can stop there and be done or take it a step further and kick it up a notch.
Adding fall leaves to your sign
I had some small wooden stick-on leaves that I also found in the Dollar Spot that I wanted to use. They were bare wood and they would have been nice as is, but I went a step further and painted them.

I had some orange and purple craft paint so I mixed them together and painted the leaves with a small paint brush.
Next I wiped them off with a dry paper towel, to remove most of the paint.
Then I just peeled the backing off and stuck my leaves on the sign.
They were the perfect touch to my easy fall sign. I like the 3D effect that they give to the sign.

I love it when a fall craft comes together so quickly and easily.
More fall crafts…
Easy DIY Fall Sign
How to make an easy and inexpensive fall sign with a vinyl sticker and stick-on leaves in minutes. A fun fall craft that anyone can do.
Materials
- pre-made chalkboard sign
- fall vinyl sticker
- transfer tape
- scissors
- squeegee
- stick-on wooden leaves
- orange paint
- paint brush
Instructions
- Gather supplies
- Make sure chalkboard sign is clean and free of dust
- Cut transfer tape to size of vinyl sticker
- Peel off backing and apply transfer tape on to sticker
- Rub the top of transfer tape with the squeegee to get the vinyl sticker to transfer
- Peel transferred vinyl sticker and place in center of chalkboard sign
- Use squeegee and rub vinyl sticker so it transfers on to the chalkboard sign
- Peel back transfer tape
- Leave as is and hang sign or add a few wood leaves
- Paint wood stick-on leaves with orange craft paint
- Wipe off paint with dry paper towel
- Stick leaves on sign
- Hang sign and enjoy!
- Happy Fall Y'all!