
DIY Shiplap Wall
An easy and inexpensive way to have a DIY shiplap wall in your home.
When we started the process of redoing the guest bedroom, I knew it would be slow going but I didn’t think it would be 4 months slow.
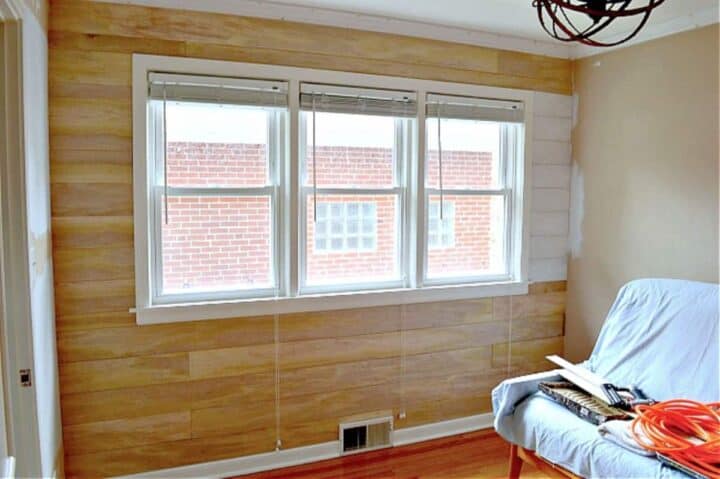
We’ve already painted the ceiling and trim, installed crown molding and a DIY light fixture, but the biggest problem has been the water damage on the window wall, where we installed the shiplap planks.
We think that the chimney, which is located where you see the primed planks, was leaking where it meets the roof.

After some handy roof work done by Roger we are hoping that the problem is fixed.
Fingers crossed.
Once the roof was fixed, we pulled some of the old plaster off and cut holes in the wall where the leaks were to make sure there was no mold behind the wall.
Thankfully it was mold free and it stayed dry for the two months we left it open, so we patched up the holes and primed with some Kilz.
Our bedroom wall was finally ready for shiplap.
Supplies for a DIY shiplap accent wall
- 2 pieces 3/16″ underlayment boards (ripped into strips at the home improvement store)
- nail gun
- miter saw
- sand paper
- spackle
- caulk
- paint

Before you install a shiplap wall
The very first thing I did before any boards went up on the wall, was to paint the wall the same color I painted the shiplap boards.
The reason you need to do this is because you can sometimes see the wall between the planks. To keep everything looking sharp, I recommend you prep your wall(s) this way.
So, my paint color of choice was Benjamin Moore Palest Pistachio, the same color as the other 3 walls in the room.
Installing a shiplap accent wall
With all the prep done we are ready to install our shiplap.
Actually, putting up the shiplap was the easiest part of this project. Since our wood was already cut into strips (thanks Home Depot!), we just had to hang them.
I didn’t want this to be a complicated task of measurements and mathematics, so we just kind of slapped them up on the wall. We started right under the new crown molding, in the corner of the wall.

We did need to do a little bit of measuring and cutting around the windows and the return vent at the bottom of the wall but it wasn’t difficult.
The planks actually went up pretty quickly, taking us about 2 hours to cut and put all up.
I spent another hour spackling, caulking and sanding all the nail holes. After it was prepped I painted 2 coats of BM Palest Pistachio finished it off.
I’m thrilled with the results and would love to have it in another room, maybe cover all 4 walls.
Woohoo…living on the edge!

Check out our other shiplap wall DIY in our small powder room addition.
