
How to Make a Concrete Christmas Tree
This post may contain affiliate links, please see our policy for details.
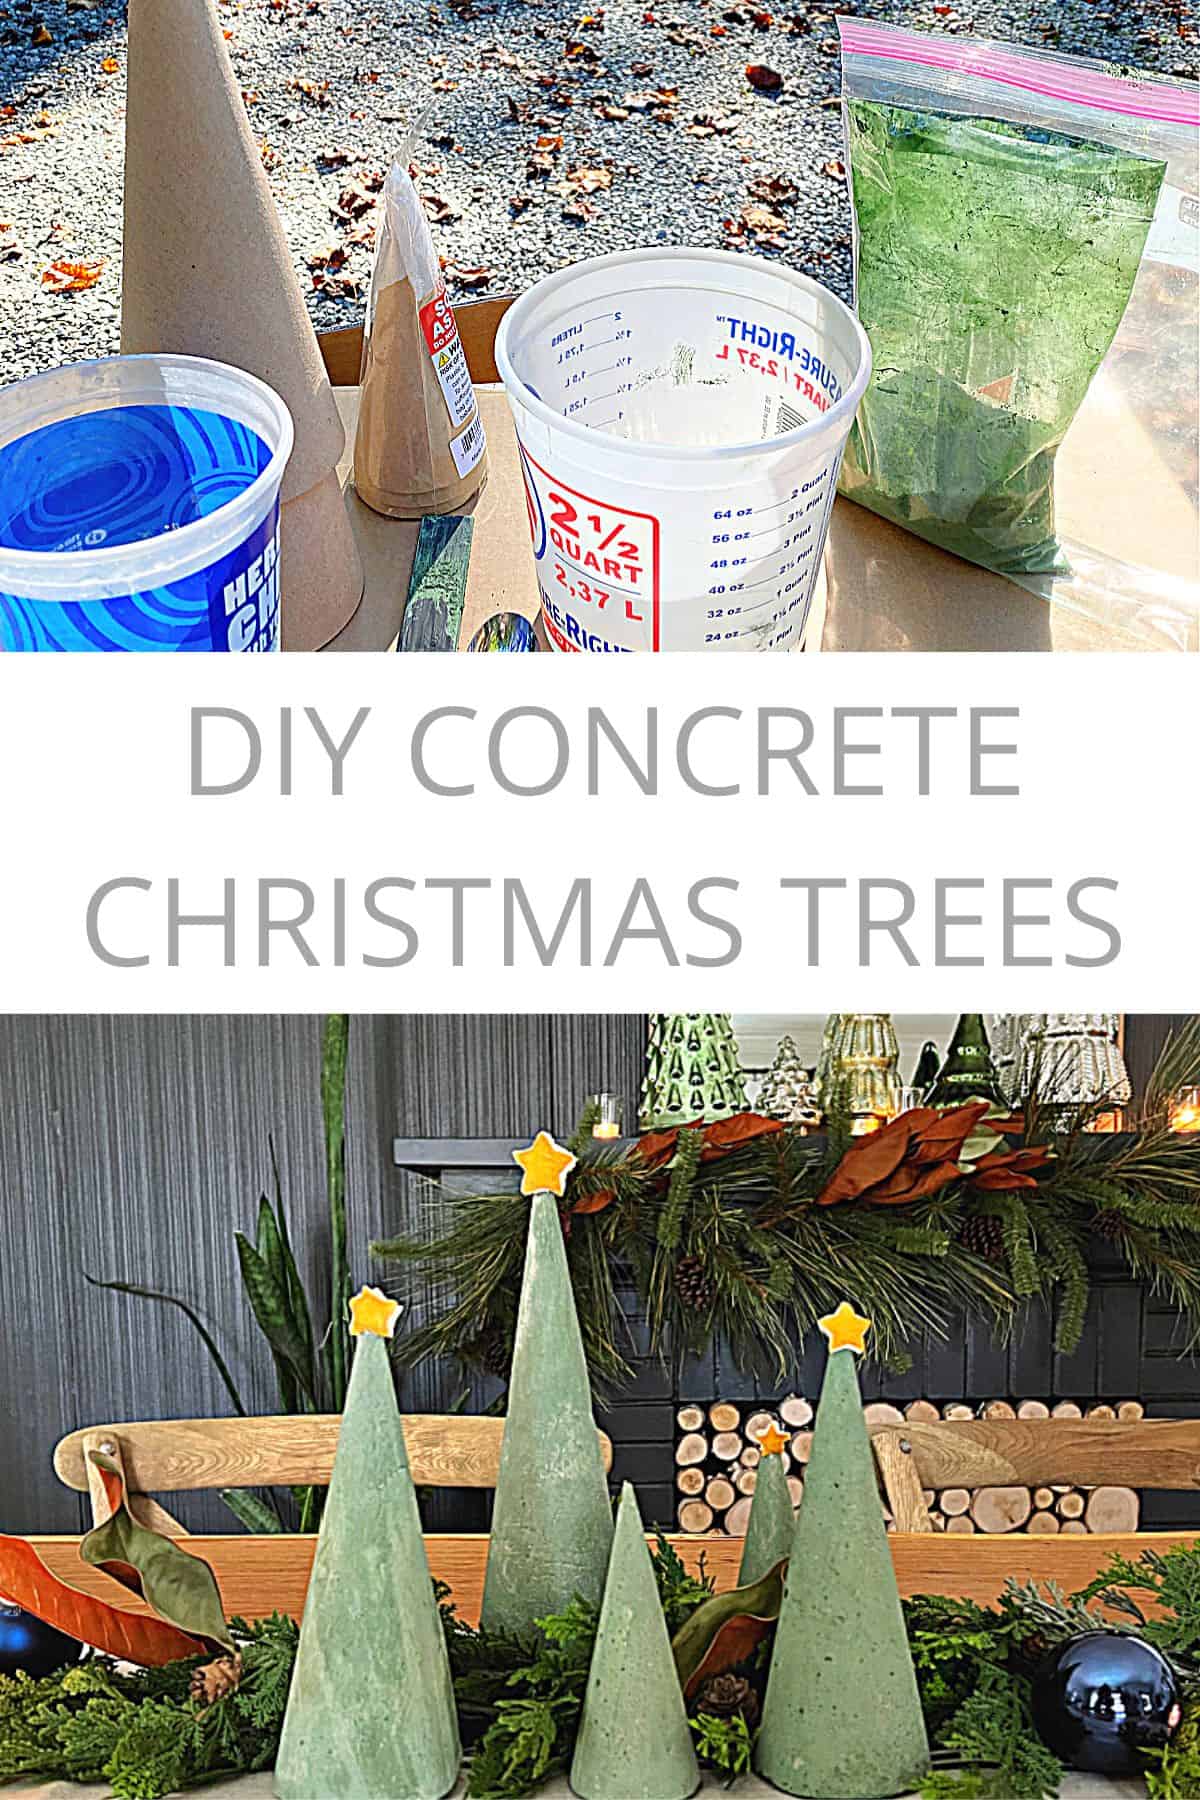
Easy to make DIY concrete Christmas tree with lemon peel stars for a unique Christmas centerpiece.
Who can resist a fun Christmas craft?
It’s my favorite time of year to craft so I’m always looking for a fun and new idea to try out.
This year I decided to work with something that I’ve never worked with before…concrete. Not only did my project turn out great, but working with concrete was as easy and fun as I’d hoped.

Supplies for concrete Christmas trees
- cardboard cones
- cooking spray
- concrete/mortar mix
- concrete dye
- 1/4 cup measuring cup
- tablespoon
- small bucket
- cup of water
- stir stick
- gloves
- mask
- scrub brush
- large bucket
Making cement Christmas trees
I have always been intimidated by concrete but it really was an easy process and the possibilities for these cement trees are endless.
Before I started this project though, I did a bit of research on coloring concrete. I knew that I wanted my trees to be green but I wasn’t sure if I wanted to paint them after they were made or if I wanted to use concrete dye.
Obviously I ended up going with concrete dye, which was actually really simple to use.
As far as the concrete?
Well, I didn’t actually use concrete, I used rapid set mortar mix.

I looked at both at the home improvement store but the rapid set mortar mix had a smoother consistency that I felt was perfect for my trees.
The concrete forms I used were actually cardboard cones I found online in different sizes. The concrete dye powder was also bought online, while all of my other supplies were found in my garage.
So…with all of the particulars out of the way, let’s start our Christmas tree project.
To begin the process I assembled my supplies.

After I suited up with gloves and a mask, I measured out the mortar mix and put it in my small bucket.

Because this was my first time mixing cement, and because it sets up in 15 minutes, I did several small batches just to make sure I didn’t mess it up.
To keep each batch consistent, I kept track of how much mortar mix I used and concrete dye.
For my trees I used 14, 1/4 cup scoops of mortar mix to 2 tablespoons of concrete dye for each batch.
That amount yielded either one tall Christmas tree or one medium sized and one small tree.
Tip for using concrete dye
Concrete dye in powder form is very concentrated, like really concentrated, so a little bit goes a long way.
It will also stain anything it touches, including clothing and skin, so be sure to wear old clothes and protect your skin when you’re handling it.
Mixing concrete and dye
Once the mortar mix and dye are in the bucket, it needs to be mixed well with the tablespoon. You want to fully incorporate the dye with the mix.

After the mortar and dye are mixed it’s time to add water.
I just added a little bit at a time, stirring with a paint stick each time I added a bit of water.

You want the mortar mix to be the consistency of a thick paste. Not too wet but just wet enough.

After the concrete is mixed you can prepare the cardboard cone for the concrete. The idea is to lubricate the cardboard cone so that it easily releases from the concrete.
I experimented a little by spraying a bit of cooking spray in some of the cones, while not using anything in others.
Sometimes the spray seemed to help but sometimes it didn’t. It didn’t hurt anything to use it though.

Filling Form with concrete
Once the cone was ready I used my tablespoon to scoop the cement mixture in.
Remember, the mortar mix sets up in 15 minutes so you want to work quickly.

As I filled each cone I hit the sides to get the concrete to settle.

After the cardboard cone was filled I spent a few minutes hitting the sides of the cone with my hands to level the mixture.
I didn’t fill the cones all the way to the top but I did try to make sure that the bottom was level so that my trees would sit straight.
This is an important step because it’s really easy to get a tree that sits a bit crooked. Ask me how I know this.

That’s it!
You just need to put the filled concrete cone form in a cool, dry place to let it dry. It’s important to keep the cone straight and steady as it dries so take extra care to put it in a secure spot.
As I mentioned earlier, the mortar mix will set up in 15 minutes but I left mine sit overnight, about 24 hours, before I moved on to the next step.
Removing the concrete form
After 24 hours I started to remove the cardboard from the concrete tree. I simply scored the cardboard with a sharp utility knife.

Then I peeled the cardboard from the concrete.

Like I said, the cardboard didn’t always come off cleanly but you’ll wash away whatever is left over in a bucket of water anyway.
Washing your concrete Christmas trees
Besides leftover cardboard, the dried concrete has a chalky cast on it from the concrete dye. To remove it all I just filled a large bucket with water and let the tree soak for 20 minutes or so.
Then I used a scrub brush to clean off any remaining cardboard and dye residue.

Once all the trees were clean, I left them to dry for a week.
Decorating with concrete Christmas trees
When they were dry I set them up as a centerpiece on the dining room table. I loved them but they seemed to be missing something.

I mean, you can’t have a Christmas tree without a star on top, so I set out to create a few for some of the trees using lemons.
Lemon Peel Stars
Supplies
- 2-3 lemons
- small star cookie cutters
- paring knife
- cutting board
- drying rack
- hot glue gun
How to make lemon stars
You could do this with any citrus but I wanted yellow stars so I went with lemons.
I simply peeled a lemon, trying to keep the peel intact.

I laid the peel on the cutting board and used small star cookie cutters to create stars.


The concrete trees are different sizes so I cut out 3 sizes.
Some of the stars didn’t cut cleanly so I used scissors to quickly clean up the edges.

Once I had enough stars I laid them on a drying rack and let them dry overnight.

Attaching lemon stars
When the lemon stars were dry I glued them to the trees with a small dab of hot glue.

I doubled up on some of the trees, putting a star on the front and back side, while a couple of trees just got one star.

Concrete Christmas Trees Centerpiece
The lemon stars were the perfect touch for my concrete Christmas tree centerpiece.
I like the differing heights of the trees and the sprinkling of lemon stars on some, while the others are naked.
This was such a fun project to do and now I have a unique Christmas centerpiece for my dining table.
I’ll definitely work with concrete again.


Kristi,
These are so pretty and unique. I must try this!
Thanks so much, Kathleen! I hope you give them a try!
These are so pretty, I love the green color, thanks and have a Merry Christmas.
Thanks Marlene, I appreciate it! Merry Christmas to you!!!
How cool are these
Nice Christmas shade of green- initial picture I thought they were gray.
Your table is lovely and the trees compliment the other ornaments.
Another unique DYI—great job!!
Merry Christmas 🎄
Thanks Mom! I appreciate it!